General installation instructions#
JDK Installation#
On the servers designated to install the Blitz Identity Provider server software and the Blitz Identity Provider administrative console, you must install and configure JDK 8:
One of the following is recommended as the JDK:
OpenJDK 8;
Liberica JDK 8;
Axiom JDK 8 Certified;
Oracle JDK 8.
When using a certified version of Blitz Identity Provider, it is recommended that you use one of the following JDKs:
OpenJDK 8;
Axiom JDK 8 Certified.
Guidelines for OpenJDK 8 on CentOS and RHEL installation:
Run the command:
sudo yum install java-1.8.0-openjdk-devel
Instructions for installing Liberica JDK 8 in Astra Linux Special Edition 1.6:
download the Liberica JDK 8 distribution from the vendor’s website;
run the command:
pkg -i bellsoft-jdk8u252+9-linux-amd64.deb
open the
java.securityfile in the/usr/lib/jvm/bellsoft-java8-amd64/jre/lib/securitydirectory for editing;uncomment (or add) the line:
crypto.policy=unlimited
Instructions for installing Axiom JDK 8 Certified in Astra Linux Special Edition 1.7:
download the Axiom JDK 8 Certified distribution from the vendor’s website;
run the command:
dpkg -i bellsoft-jdk-certified8u322+7-linux-amd64-astra.deb
open the
java.securityfile in the/usr/lib/jvm/bellsoft-java8-amd64/jre/lib/securitydirectory for editing;uncomment (or add) the line:
crypto.policy=unlimited
Guidelines for Oracle JDK 8 installation and configuration:
download the Oracle JDK 8 distribution as a tar archive.
copy the downloaded distribution to the servers (for example, to the
/tmpdirectory).create a directory for installing Oracle JDK 8:
mkdir -p /opt/oracle/jdk/
unpack the Oracle JDK 8 distribution into the created directory:
tar xf /tmp/jdk-8uXXX-linux-x64.tar.gz -C /opt/oracle/jdk/
If Oracle JDK version is 1.8.0_151 or higher:
open the
java.securityfile in the/opt/oracle/jdk/jdk1.8.0_XXX/jre/lib/securitydirectory for editing,uncomment (or add) the line:
crypto.policy=unlimited
If Oracle JDK version is 1.8.0_144 or lower:
download distribution Java Cryptography Extension (JCE) Unlimited Strength Jurisdiction Policy Files 8.
copy the downloaded distribution to the servers (for example, to the
/tmpdirectory).unpack the archive and copy the contents to the directory with Oracle JDK 8 installed:
cd /tmp
unzip jce_policy-8.zip
cp UnlimitedJCEPolicyJDK8/*.jar /opt/oracle/jdk/jdk1.8.0_XXX/jre/lib/security/
Memcached installation#
The memcached version must be 1.4.15 or higher. The memcached service must be installed on the servers intended for installing Blitz Identity Provider applications: blitz-console, blitz-idp, blitz-registration, blitz-recovery. The memcached service is not required for the blitz-keeper application.
To install memcached in CentOS and RHEL:
run the command:
yum -y install memcached
after installation is complete, add the memcached service to the autorun and start the service:
systemctl enable memcached
systemctl start memcached
To install memcached in Astra Linux Special Edition 1.6: - execute the command:
apt-get install memcached
after installation is complete, add the memcached service to the autorun and start the service:
systemctl enable memcached
systemctl start memcached
The memcached service runs on port 11211. Make sure that this port is open on firewalls and can be used to connect between servers with Blitz Identity Provider applications.
DBMS installation and configuration#
Blitz Identity Provider Authentication server supports the use of the following DBMSs:
DBMS Couchbase Server - recommended for building authentication systems with a peak load of over 1000 requests in a second, more than 1 mln authentications per day and with high fault tolerance requirements.
PostgreSQL DBMS (or other relational DBMS supporting JDBC) - recommended when creating authentication systems with moderate load and medium requirements for fault tolerance, as well as when using domestic operating systems.
Couchbase Server Installation#
Couchbase Server installation instructions are provided for CentOS 7 and RHEL 7. In case of deployment for domestic operating systems, it is recommended to use PostgreSQL as the DBMS.
You must install Couchbase Server on each of the servers allocated for DBMS installation according to the instructions.
Couchbase Server distribution can be downloaded here.
Important
In DEV/TEST environments, it is acceptable to install Couchbase Server on existing servers with Blitz Identity Provider, but in this case you have to take into account that Couchbase Server uses its own built-in Memcached service, and to avoid a conflict you need to adjust the Memcached ports used in Blitz Identity Provider and Couchbase Server.
After installation is complete, add the Couchbase Server service to the autorun and start the service:
systemctl enable couchbase-server
systemctl start couchbase-server
Check if the service is running by executing the command:
systemctl status couchbase-server
Next you need to:
Initialize Couchbase Server cluster on each server according to instructions (the first server initializes the cluster, other servers are included in the cluster). All settings can be set as suggested by default, only you need to set the full server name for each server in
hostname. It is not recommended to use the IP address of the server as the server name.On any of the servers in the Couchbase Server cluster, run the script to prepare Couchbase Server to use Blitz Identity Provider:
the script is located in the
couchbasedirectory in theresources.ziparchive in the Blitz Identity Provider distribution kit;script should be copied to any Couchbase Server cluster server;
then go to the directory and run buckets create script to store Blitz Identity Provider information and indices to perform search Blitz Identity Provider requests in the database:
./cb_init.sh
The script will need to be entered during execution:
Couchbase Server URL name - enter a string like
http://<hostname>:8091, where hostname is the host name of the server from which the script is executed;Couchbase Server administrator account login - set during cluster initialization when you perform the previous step of the instructions;
Couchbase Server administrator account password - set during cluster initialization when you perform the previous step of the instructions;
Couchbase Server account login - set during the running of Blitz Identity Provider application connection script;
Couchbase Server account password for Blitz Identity Provider application connection.
After running the script, make the following settings:
in the Couchbase Server administration console, edit the settings for the number of data copies on different Couchbase instances. To do this, select each bucket in turn in the “Buckets” menu, click “Edit” on it and set the “Enable” setting in the “Replicas” block and set the number of replicas. For a cluster of 3 servers it is recommended to set
1for the number of replicas. Then, it is recommended to enable the “Enable auto-failover” setting in the “Settings” menu and set the “Timeout” value to30seconds (auto-failover will work only if the DBMS cluster has at least 3 servers and bucket replication is configured).set up a database backup using instruction.
PostgreSQL installation and configuration#
PostgreSQL version must be 9.6 or newer. In the case of CentOS and RHEL, PostgreSQL must be installed according to the instructions.
In case of Astra Linux Special Edition 1.6, to install PostgreSQL you need:
run the command:
apt-get install postgresql
after the installation is complete, start the service:
systemctl start postgresql
After completing the installation of PostgreSQL in the selected operating system, you must run script to prepare the PostgreSQL to use the Blitz Identity Provider:
scripts are located in the
postgresdirectory in theresources.ziparchive as part of the Blitz Identity Provider distribution;scripts must be copied to the PostgreSQL server;
then go to the directory and run the commands one by one:
su - postgres

createdb blitzdb

psql
CREATE USER blitz WITH ENCRYPTED PASSWORD 'set-your-pwd';
GRANT ALL PRIVILEGES ON DATABASE blitzdb TO blitz;
GRANT ALL ON ALL TABLES IN SCHEMA public TO blitz;

psql -d blitzdb -U blitz -f 000-SCRIPT000.sql
…
psql -d blitzdb -U blitz -f NNN-SCRIPTNNN.sql
instead of
set-your-pwdyou should insert the password that will be used to connect to PostgreSQL.instead of
000-SCRIPT000.sql ... NNN-SCRIPTNNNNNN.sqlyou should insert the names of scripts from thepostgres/ddldirectory from theresources.ziparchive. For example, for release 5.15 these are the scripts:
psql -d blitzdb -U blitz -f 000-service-tasks.sql
psql -d blitzdb -U blitz -f 001-init-database.sql
psql -d blitzdb -U blitz -f 002-new_pp_columns.sql
psql -d blitzdb -U blitz -f 003-usd_id_table.sql
psql -d blitzdb -U blitz -f 004-usr_auth_table.sql
psql -d blitzdb -U blitz -f 005-usr_agt_table.sql
psql -d blitzdb -U blitz -f 006-usr_htp_hmc_alg.sql
psql -d blitzdb -U blitz -f 007-usr_atr_cfm.sql
psql -d blitzdb -U blitz -f 008-wak.sql
psql -d blitzdb -U blitz -f 009-fix_pp_column.sql
psql -d blitzdb -U blitz -f 010-add_usr_prp.sql
psql -d blitzdb -U blitz -f 011-pp_audit.sql
psql -d blitzdb -U blitz -f 012-geo_to_audit.sql
psql -d blitzdb -U blitz -f 013-tasks.sql
psql -d blitzdb -U blitz -f 014-sec_ch_ua.sql
psql -d blitzdb -U blitz -f 015-5.12.0.sql
psql -d blitzdb -U blitz -f 016-5.13.0.sql
psql -d blitzdb -U blitz -f 017-5.15.0.sql
set up a database backup using instruction.
RabbitMQ Queue server Installation and configuration#
Installation of the RabbitMQ Queue server is optional and is required if the Queue server is to be used to pass events to adjacent systems (see Configuring sending events to the queue server) or as a message broker (see Configuring the use of a queue server as a message broker).
In the case of CentOS and RHEL, you need to install RabbitMQ according to instructions.
In the case of Astra Linux Special Edition 1.6, to install RabbitMQ you need:
run the command:
apt-get install rabbitmq-server
after the installation is complete, start the service:
systemctl start rabbitmq-server
Installing Blitz Identity Provider applications#
Blitz Identity Provider consists of the following applications:
blitz-console - Admin console Blitz Console;
blitz-idp - authentication service and web application ”User profile”;
blitz-registration - registration service;
blitz-recovery - password recovery service;
blitz-keeper is a security gateway.
A single installer blitz-5.X.X.bin is used to install the blitz-console, blitz-idp, blitz-registration, and blitz-recovery applications.
The blitz-keeper application uses its own installer blitz-keeper-5.X.X.X.bin to install the blitz-keeper application.
When installing a certified version of Blitz Identity Provider, the blitz-idp-thirdparty-5.X.X.X.tar.gz and blitz-keeper-thirdparty-5.X.X.tar.gz files containing archives with third-party libraries used by Blitz Identity Provider are additionally used.
You can install the admin console on any server where the Blitz Identity Provider server is installed, but it is recommended that a separate administrative server be dedicated to the installation of the Admin console. The JDK and memcached must be installed on the server beforehand.
To install blitz-console, blitz-idp, blitz-registration, blitz-recovery applications you need:
copy the files
blitz-5.X.X.X.binandblitz-idp-thirdparty-5.X.X.X.tar.gzfrom the Blitz Identity Provider distribution (only in case of installation of the certified version) to the servers intended for installation;run the
blitz-5.X.X.bininstaller:
cd /tmp
chmod +x blitz-5.X.X.bin
./blitz-5.X.X.bin
in response to the installer’s prompts set:
list of applications to be installed, separated by a space (if all applications are installed, specify
all);JAVA_HOME value - specify the directory where the JDK is installed on the server (for example,
/usr/lib/jvm/bellsoft-java8-amd64for Liberica JDK and Axiom JDK Certified,/usr/lib/jvm/java-1.8.0-openjdkfor OpenJDK 8,/opt/oracle/jdkfor Oracle JDK 8);path to the file
blitz-idp-thirdparty-5.X.X.X.tar.gz(only if you install the certified version);external domain name where Blitz Identity Provider will run;
The URL path where the Blitz Identity Provider will function (by default,
/blitz);password to the Blitz Identity Provider key store. The key store will be generated during the installation process, and access to the store will be locked with the specified password.
wait until the installation of the applications is complete. The installation will be done in the
/usr/share/identityblitzdirectory. If the blitz_console application is installed, the Blitz Identity Provider administrator login/password will be generated and displayed;
Your Blitz Identity Provider configured on domain: blitz-cert.loc
Your Blitz Identity Provider Console available on addresses:
  http://localhost:9001/blitz/console
  http://localhost:9001/blitz/console

Administration user credentials of Blitz Console:
  username - admin
  password - 50c2E6298B
You can change user credentials at the file - /usr/share/identityblitz/blitz-config/credentials
Tip
If input errors were made when running the installer, so that the installation was performed with incorrect parameters, you can use the following command to delete the files that the installer created so that you can perform a clean installation again:
rm -rf /usr/share/identityblitz /etc/default/blitz-* /etc/blitz-* /var/log/identityblitz/ /lib/systemd/system/blitz-*
edit the settings file
/usr/share/identityblitz/blitz-config/blitz.conf:in case of using Couchbase Server as a DBMS, in the
blitz.prod.local.idp.storessettings block, change thedefault-typesetting tocbin theblitz.prod.local.idp.internal-store-cbsettings block. In theblitz.prod.local.idp.internal-store-cbsettings block, in[CB_NODES]list the names of each Couchbase Server database server as the FQDN of the server name (for example,"node1.blitz.loc"). You do not need to specify port numbers innodes. Specify the login (user) and password (password) of the Couchbase Server administrator account. The password should be specified in plaintext, it will be encrypted after Blitz Identity Provider is started. Also in configurationioConfandtimeoutConfadjust the parameters of the connect pool if necessary:
"internal-store-cb" : {
    "nodes" : [CB_NODES],
    "user" : "CB_USERNAME",
    "password" : "CB_PASSWORD",
    "metrics": false,
    "ioConf": {
        "numKvConnections": 1,
        "maxHttpConnections": 12,
        "idleHttpConnectionTimeout": 5
    },
    "timeoutConf": {
        "connectTimeout": 10,
        "kvTimeout": 3,
        "kvDurableTimeout": 10,
        "queryTimeout": 75
    }
}
in case of using PostgreSQL as a DBMS, check in the
blitz.prod.local.idp.storessettings block that thedefault-typesetting is set tojdbc. In theblitz.prod.local.idp.internal-store-jdbcsettings block, adjust the database connection parameters:PG_HOSTNAME- host name,PG_DBNAME- database name for Blitz Identity Provider (for example,blitzdb),PG_USERNAMEandPG_USERPASSWORD- user name and password for Blitz Identity Provider in the database. The password is specified in plaintext and will be encrypted in the configuration file when Blitz Identity Provider is launched. ThekeyAliasparameter specifies the name of the key in the key container (keystoreconfiguration block) on which sensitive data is encrypted when saved to the database. The key can be generated using the following command:keytool -genseckey -alias jdbc -keyalg AES -keysize 128 -storetype JKS -keystore blitz_store.jks. If no parameter is specified, the parameters are not encrypted. In thepoolsetting, adjust the parameters of the connect pool if necessary:
"internal-store-jdbc" : {
    "conn_url" : "jdbc:postgresql://PG_HOSTNAME:5432/PG_DBNAME?user=PG_USERNAME&password=${pswd}&loggerLevel=DEBUG&tcpKeepAlive=true",
    "db_name" : "PG_DBNAME",
    "keyAlias" : "jdbc",
    "enc_params" : {
        "pswd" : "PG_USERPASSWORD"
    },
    "pool" : {
        "max_idle_conn" : 5,
        "max_total_conn" : 20,
        "max_wait_conn_ms" : 30000,
        "min_idle_conn" : 1
    }
}
edit the
blitz.prod.local.idp.netblock by adding the subnet addresses of the Blitz Identity Provider application servers to thetrustedServerssetting:
"net" : {
    "domain" : "blitz-domain.com",
    "trustedServers" : [
      "192.168.1.0/24"
    ]
}
edit the
memcachedblock in the/usr/share/identityblitz/blitz-config/play.confsettings file:"memcached" : { "operationTimeout" : 1000, "timeoutExceptionThreshold" : 1, "maxReconnectDelay" : 10, "servers" : [ "[MEMCACHED]" ] }
[MEMCACHED] - specify the host and port of the memcached service (for example,
ld-s-blitz1-dev.ao.company:11211).You can also adjust the memcached connection management settings as needed:
operationTimeout- time to wait for memcached request execution in ms;timeoutExceptionThreshold- the number of attempts to execute the request, after which the node is considered unavailable;maxReconectDelay- the interval between attempts to establish a connection to the node in seconds.
If you plan to use the REST services protection function with Blitz Identity Provider, copy the
blitz-keeper-5.X.X.X.binandblitz-keeper-thirdparty-5.X.X.X.tar.gzfiles from the Blitz Identity Provider distribution package to the servers intended for installation of the Security Gateway (for example, to the/tmpdirectory) (only if you install the certified version);run the
blitz-keeper-5.X.X.bininstaller:
cd /tmp
chmod +x blitz-keeper-5.X.X.bin
./blitz-keeper-5.X.X.bin
in response to the installer’s prompts set:
value
JAVA_HOME- specify the directory where the JDK is installed on the server (for example,/usr/lib/jvm/bellsoft-java8-amd64for Liberica JDK and Axiom JDK Certified,/usr/lib/jvm/java-1.8.0-openjdkfor OpenJDK 8,/opt/oracle/jdkfor Oracle JDK 8);path to the file
blitz-keeper-thirdparty-5.X.X.X.tar.gz(only if you install the certified version).
wait until the installation of the application is complete. The installation will be performed in the
/usr/share/identityblitzdirectory.the final step is to add applications to autorun on their respective servers and run them:
systemctl enable blitz-console
systemctl start blitz-console
systemctl enable blitz-idp
systemctl start blitz-idp
systemctl enable blitz-registration
systemctl start blitz-registration
systemctl enable blitz-recovery
systemctl start blitz-recovery
systemctl enable blitz-keeper
systemctl start blitz-keeper
Configuring Blitz Identity Provider application launch options#
The following Java options are available for Blitz Identity Provider applications to define enabling special modes of application operation and override the default modes of operation:
blitz.login.cookie.sameSite- specifies the flag with which session cookies should be created in Blitz Identity Provider. By default, cookies are created with the flagsameSite=Lax. This can be overridden toNone.blitz.login.outside.flow.callback.ttl.sec- specifies the time to wait for a response from an external authentication method called from the Blitz Identity Provider. The default value is300seconds.blitz.login.mus.cookie.unused.ttl.sec- sets the lifetime of the cookie responsible for memorizing the list of logged in users in the current browser. The default value corresponds to365days (the value is set in seconds);blitz.login.bua.cookie.ttl.sec- sets the validity time of the cookie used to remember the user’s browser. The default value corresponds to365days (the value is set in seconds);blitz.login.setLastAuth.disabled- allows to disable writing the time of the last user authentication to the database. By default, the time of the last user authentication is written to the database. Disabling recording of the last authentication time allows to increase database performance, but does not allow to use the function of blocking accounts by inactivity (see Blocking inactive users);blitzDispatchedQueues- specifies the name of the queue from which the Blitz Identity Provider application processes tasks for sending emails, user registration and password recovery. The default queue name isdefault;blitz.stores.united.u-cache.ttlInSec- the expiration time of the account data cache provided via the REST API. The default is1second;blitz.csrf.cookie.ttlInSec- specifies the validity time of the cookie preventing CSRF. The default corresponds to6hours (the value is set in seconds). This is the maximum time from the moment the user opens the page until the completed page is executed by the user to the server;blitz.jdbc.cols.types.strings- specifies the column type used to store string attributes in the relational DBMS (PostgreSQL). Thetexttype is used by default;blitz.jdbc.pool.stat-period- specifies the frequency at which JDBC usage statistics are logged. The default is300seconds;saml.numThreads- specifies the number of threads that the Blitz Identity Provider processes SAML input requests. The default is32threads;blitz.oauth.exchange.rules.fs.cache.capacity- Specifies the cache size used by the Blitz Identity Provider to check microservice access rules. The default cache size is10000checks;blitz.oauth.dyn.reg.clientSecretLength- specifies the size ofclient_secretgenerated when dynamically registering a pair ofclient_idandclient_secret. By default,client_secretis generated with a size of15characters.blitz.oauth.dyn.reg.clientAttachingTllInSec- specifies the time during which theclient_idandclient_secretpair generated during dynamic registration should be associated with the user (if the pair is not associated with the user during this time, it will be canceled). The default corresponds to1hour (the value is specified in seconds).extensionsDiris the address of the directory with extension modules for Blitz Identity Provider (see Configuring the external attribute validator).metrics– allows you to disable gathering performance metrics in the Prometheus format. To do so, set the value tofalse. By default, metric gathering is enabledcouchbase.durability.mode- specifies the mode of data saving in Couchbase Server. In case of using Couchbase Server version 6.0.1 or older,clientVerifiedmode must be used. If you are using Couchbase Server versions 6.5, 7.0 or newer,clientVerifiedmode cannot be used. The parameter in Couchbase Server versions 6.5, 7.0 becomes optional (in the absence of the parameter,majoritymode is used) and allows you to select the required data retention assurance mode in a cluster with replication from the following options:disabled- waiting for memory-only writes on the primary node of the cluster;majority- waiting for memory writes on the primary node and most replicas;majorityAndPersistActive- waiting to write to disk on the primary node and write to memory for most replicas;persistToMajority- waiting to write to disk on the primary node and in most replicas.
akka.http.parsing.max-uri-length- sets the maximum length of URL in the browser string. In some cases it may be necessary to increase the string size, then it is recommended to set16kin this parameter.akka.coordinated-shutdown.phases.service-stop.timeout- sets the waiting time after receiving the command to stop the service, during which the service can complete the tasks taken into work. If you use the message broker built into Blitz Identity Provider, it is recommended to set the parameter to30sfor the application.
It is recommended that you consult with Blitz Identity Provider technical support before installing options.
Warning
It is not guaranteed that the options used will be preserved in future versions of Blitz Identity Provider.
To set options with values different from the default values, it is necessary to edit the /etc/default/blitz-idp file. Set the necessary JAVA_OPTS in it. Below is an example of a file in which the blitz.csrf.cookie.ttlInSec and blitz.login.cookie.sameSite options are also set among the Java options. After changing JAVA_OPTS, you must restart the Blitz Identity Provider applications on which the changes are made.
export JAVA_HOME=/usr/java/default
export PIDFILE=/usr/share/identityblitz/blitz-idp/RUNNING_PID
export JAVA_OPTS="-server -Xms512m -Xmx1G -XX:MaxMetaspaceSize=512m -Xmn256m -Dcom.couchbase.connectTimeout=30000 -Dakka.http.parsing.max-uri-length=16k"
export JAVA_OPTS="$JAVA_OPTS -Dblitz.csrf.cookie.ttlInSec=36000 -Dblitz.login.cookie.sameSite=None -Dplay.filters.headers.frameOptions=null"
Configuration files synchronization setup#
When you deploy Blitz Identity Provider in a cluster, you must configure synchronization of the Blitz Identity Provider configuration between Blitz Identity Provider cluster servers:
On a server with the Bitz Identity Provider Console Admin console:
install
rsyncandincron:
sudo yum install rsync incron
or (for Astra Linux Special Edition 1.6)
sudo apt install rsync incron
to switch to user
blitz:
sudo su - blitz
generate an ssh key with the command (it is recommended to choose the default answers for all the prompts by the utility):
ssh-keygen
read and save the public ssh key for future use:
cat /usr/share/identityblitz/.ssh/id_rsa.pub
open the incrontab settings:
incrontab -e
in the opened editor window, insert the following:
/usr/share/identityblitz/blitz-config IN_MODIFY,IN_ATTRIB,IN_CREATE,IN_DELETE,IN_CLOSE_WRITE /usr/share/identityblitz/scripts/config_sync.sh ./ $# $%
/usr/share/identityblitz/blitz-config/assets IN_MODIFY,IN_ATTRIB,IN_CREATE,IN_DELETE,IN_CLOSE_WRITE /usr/share/identityblitz/scripts/config_sync.sh assets $# $%
/usr/share/identityblitz/blitz-config/assets/services IN_MODIFY,IN_ATTRIB,IN_CREATE,IN_DELETE,IN_CLOSE_WRITE /usr/share/identityblitz/scripts/config_sync.sh assets $# $%
/usr/share/identityblitz/blitz-config/assets/themes IN_MODIFY,IN_ATTRIB,IN_CREATE,IN_DELETE,IN_CLOSE_WRITE /usr/share/identityblitz/scripts/config_sync.sh assets $# $%
/usr/share/identityblitz/blitz-config/apps IN_MODIFY,IN_ATTRIB,IN_CREATE,IN_DELETE,IN_CLOSE_WRITE /usr/share/identityblitz/scripts/config_sync.sh apps $# $%
/usr/share/identityblitz/blitz-config/saml IN_MODIFY,IN_ATTRIB,IN_CREATE,IN_DELETE,IN_CLOSE_WRITE /usr/share/identityblitz/scripts/config_sync.sh saml $# $%
/usr/share/identityblitz/blitz-config/saml/conf IN_MODIFY,IN_ATTRIB,IN_CREATE,IN_DELETE,IN_CLOSE_WRITE /usr/share/identityblitz/scripts/config_sync.sh saml $# $%
/usr/share/identityblitz/blitz-config/saml/credentials IN_MODIFY,IN_ATTRIB,IN_CREATE,IN_DELETE,IN_CLOSE_WRITE /usr/share/identityblitz/scripts/config_sync.sh saml $# $%
/usr/share/identityblitz/blitz-config/saml/metadata IN_MODIFY,IN_ATTRIB,IN_CREATE,IN_DELETE,IN_CLOSE_WRITE /usr/share/identityblitz/scripts/config_sync.sh saml $# $%
/usr/share/identityblitz/blitz-config/custom_messages IN_MODIFY,IN_ATTRIB,IN_CREATE,IN_DELETE,IN_CLOSE_WRITE /usr/share/identityblitz/scripts/config_sync.sh custom_messages $# $%
/usr/share/identityblitz/blitz-config/custom_messages/dics IN_MODIFY,IN_ATTRIB,IN_CREATE,IN_DELETE,IN_CLOSE_WRITE /usr/share/identityblitz/scripts/config_sync.sh custom_messages $# $%
/usr/share/identityblitz/blitz-config/devices IN_MODIFY,IN_ATTRIB,IN_CREATE,IN_DELETE,IN_CLOSE_WRITE /usr/share/identityblitz/scripts/config_sync.sh devices $# $%
/usr/share/identityblitz/blitz-config/simple IN_MODIFY,IN_ATTRIB,IN_CREATE,IN_DELETE,IN_CLOSE_WRITE /usr/share/identityblitz/scripts/config_sync.sh simple $# $%
/usr/share/identityblitz/blitz-config/certs IN_MODIFY,IN_ATTRIB,IN_CREATE,IN_DELETE,IN_CLOSE_WRITE /usr/share/identityblitz/scripts/config_sync.sh certs $# $%
/usr/share/identityblitz/blitz-config/flows/login IN_MODIFY,IN_ATTRIB,IN_CREATE,IN_DELETE,IN_CLOSE_WRITE /usr/share/identityblitz/scripts/config_sync.sh flows $# $%
/usr/share/identityblitz/blitz-config/flows/reg IN_MODIFY,IN_ATTRIB,IN_CREATE,IN_DELETE,IN_CLOSE_WRITE /usr/share/identityblitz/scripts/config_sync.sh flows $# $%
/usr/share/identityblitz/blitz-config/flows/extIdps IN_MODIFY,IN_ATTRIB,IN_CREATE,IN_DELETE,IN_CLOSE_WRITE /usr/share/identityblitz/scripts/config_sync.sh flows $# $%
/usr/share/identityblitz/blitz-config/token_exchange IN_MODIFY,IN_ATTRIB,IN_CREATE,IN_DELETE,IN_CLOSE_WRITE /usr/share/identityblitz/scripts/config_sync.sh token_exchange $# $%
/usr/share/identityblitz/blitz-config/token_exchange/rules IN_MODIFY,IN_ATTRIB,IN_CREATE,IN_DELETE,IN_CLOSE_WRITE /usr/share/identityblitz/scripts/config_sync.sh token_exchange $# $%
create a file
/usr/share/identityblitz/scripts/config_sync.shand paste the script into it:
#!/bin/bash
app_dir=/usr/share/identityblitz/blitz-config
node_list="NODES_LIST"
for node in $(echo "${node_list}"); do
rsync -r -a --delete ${app_dir}/${1} ${USER}@${node}:${app_dir};
done
as the value
node_list, instead ofNODES_LIST, the list of hostnames of the Blitz cluster nodes (except for the Blitz Console node) should be entered. The values should be entered with a space. For example:
node_list="app1.local app2.local"
make the file
/usr/share/identityblitz/scripts/config_sync.shexecutable:
chmod +x /usr/share/identityblitz/scripts/config_sync.sh
run incrontab by executing the following command as root:
systemctl enable incrond
systemctl start incrond
On the other Blitz Identity Provider application servers:
install rsync:
sudo yum install rsync
or (for Astra Linux Special Edition 1.6)
sudo apt install rsync
to switch to user
blitz:
sudo su - blitz
run the following script:
mkdir .ssh
touch .ssh/authorized_keys
chmod 700 .ssh
chmod 640 .ssh/authorized_keys
open the
.ssh/authorized_keysfile with any editor, such as vim, and paste the public ssh key previously obtained from the Blitz Console server.
Web Server configuration#
It is recommended to use nginx as a web server. A sample configuration file for nginx is included in the Blitz Identity Provider distribution - it is the blitz-idp.conf file from the nginx directory in the resources.zip archive. You need to adjust the following configuration blocks, then upload the file to the server with nginx (/etc/nginx/conf.d directory):
Adjust the balancing settings block:
upstream blitz-idp {
    server [BLITZ-IDP-NODE-01]:9000 max_fails=3 fail_timeout=120;
    server [BLITZ-IDP-NODE-02]:9000 max_fails=3 fail_timeout=120;
}
upstream blitz-reg {
    server [BLITZ-REG-NODE-01]:9002 max_fails=3 fail_timeout=120;
    server [BLITZ-REG-NODE-02]:9002 max_fails=3 fail_timeout=120;
}
upstream blitz-rec {
    server [BLITZ-REC-NODE-01]:9003 max_fails=3 fail_timeout=120;
    server [BLITZ-REC-NODE-02]:9003 max_fails=3 fail_timeout=120;
}
upstream blitz-keeper {
    server [BLITZ-KPR-NODE-01]:9012 max_fails=3 fail_timeout=120;
    server [BLITZ-KPR-NODE-02]:9012 max_fails=3 fail_timeout=120;
}
upstream blitz-console {
    server [BLITZ-CONSOLE-NODE-01]:9001 max_fails=3 fail_timeout=120;
}
The parameters have the following designations:
[BLITZ-%%%-NODE-XX]- names (hostname) of servers with Blitz Identity Provider applications (blitz-idp, blitz-registration, blitz-recovery, blitz-keeper);[BLITZ-CONSOLE-NODE-01]is the name (hostname) of the server with Blitz Console.
Correct the block of TLS termination settings:
ssl_certificate         [BLITZ-SSL-CERT-FILE];
ssl_certificate_key     [BLITZ-SSL-PRIVATEKEY-FILE];
The parameters have the following designations:
[BLITZ-SSL-CERT-FILE]- path (full name) to the file with TLS server certificate;[BLITZ-IDP-CONSOLE-NODE-01]- path (full name) to the file with TLS server key.
Note that the Blitz Identity Provider ignores the
X-Forwarded-Proto httpsheader if thenginx X-Forwarded-Forcontains more than one IP address, for exampleIt should also be noted that when using the nginx directive:proxy_set_header X-Forwarded-For $proxy_add_x_forwarded_for;
In this case, it is recommended to use the following directive value:
proxy_set_header X-Forwarded-For $remote_addr;
Copy the
static_errorsfolder with the server error page files to the/usr/share/nginx/html` folder on the nginx server. The files with examples of error pages can be found in the Blitz Identity Provider distribution - it is the ``static_errorsfolder in theresources.ziparchive.
LDAP directory installation and configuration#
You can use either an existing or specially deployed in your organization repository of accounts for its storage.
Supported:
LDAP-compliant storage. It can be any server supporting LDAP protocol, as well as Microsoft Active Directory, Samba4, FreeIPA;
other types of repositories, to connect Blitz Identity Provider to them you need develop special REST-services.
If you need to deploy a new LDAP directory, it is recommended that you use 389 Directory Server, which is included with the OS, as your LDAP directory.
To install 389 Directory Server in CentOS and RHEL:
execute the installation commands:
yum install 389-ds-base 389-adminutil 389-admin 389-admin-console 389-console 389-ds-console
yum install xauth
set
limitsaccording to the 389 Directory Server recommendations:
echo "fs.file-max = 64000" >> /etc/sysctl.conf
echo "* soft nofile 8192" >> /etc/security/limits.conf
echo "* hard nofile 8192" >> /etc/security/limits.conf
echo "ulimit -n 8192" >> /etc/profile
initialize the LDAP directory. Answer the installer’s questions:
setup-ds-admin.pl
after installation is complete, add the LDAP directory to the autorun and start the service:
systemctl enable dirsrv.target
systemctl start dirsrv.target
For installation in Astra Linux Special Edition 1.6:
execute the install command and the directory initialization script:
apt-get install 389-ds-base
setup-ds
after installation is complete, add the LDAP directory to the autorun and start the service:
systemctl enable dirsrv.target
systemctl start dirsrv.target
After installing 389 Directory Server, configure it to prepare it for use in conjunction with Blitz Identity Provider. To do this:
Copy to the LDAP server the LDAP configuration scripts from the Blitz Identity Provider distribution (this is the
ldapfolder in theresources.ziparchive).Execute the initial configuration script
ldap_init.sh- the script will create thesubbranch for storing users, service userreader, configure user access rights and password policy (perpetual password for service user), create theblitz-schemaclass with attributesuid,mail,mobile,n,name:
chmod +x ldap_init.sh
./ldap_init.sh
Run the TLS configuration script on the LDAP server (the script creates a copy of the current
NSS DB, then creates a newNSS DB, certificates, and apin.txtfile to start the server without entering a password):
chmod +x ldap_ssl.sh
./ldap_ssl.sh
After running the script restart the LDAP directory:
systemctl restart dirsrv.target
If you need to configure and enable global password policies in LDAP, adjust and execute the
ldap_pwdpolicy.shscript:
chmod +x ldap_pwdpolicy.sh
./ldap_pwdpolicy.sh
If you want to create additional attributes:
prepare a text file in which, on each line, write the name of the attribute to be created (i.e. a text file with a column of attributes to be created);
run the script to create additional attributes, answer its prompts:
chmod +x ldap_add_attr.sh
./ldap_add_attr.sh
edit the text file at
/etc/dirsrv/slapd-<instance name>/schema/99user.ldif, add new attributes toobjectclassnamedblitz-schemain theMAYsection;restart the LDAP directory to apply the changes to the directory schema:
systemctl restart dirsrv.target
Logging in to Admin console#
After installing Blitz Identity Provider, the basic system configuration is performed in the Admin Console, which can be accessed from the link indicated in the product installation results. For the first login to the Admin console, you must use the login and password generated at the time of installation of Admin Console.
Usually the link is of the form:
https://<blitz_domain>/blitz/console
or
http://<blitz_console_host>:9001/blitz/console
The standard view of the Admin console login screen is shown in the figure:
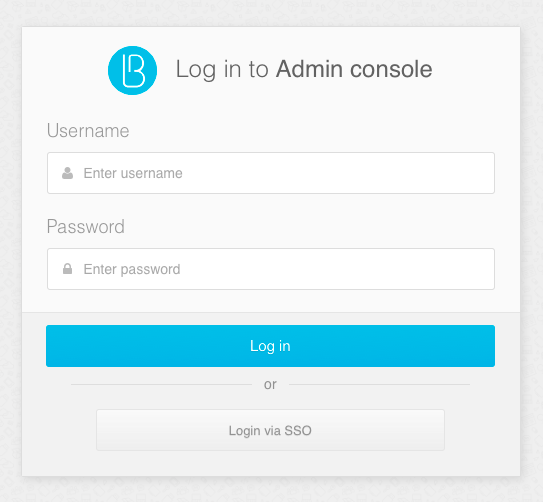
Standard view of the Admin console login screen
After successful login, the main page of the Admin Console opens, as shown below. You can navigate between the various Blitz Identity Provider settings using the menu on the left side of the screen.
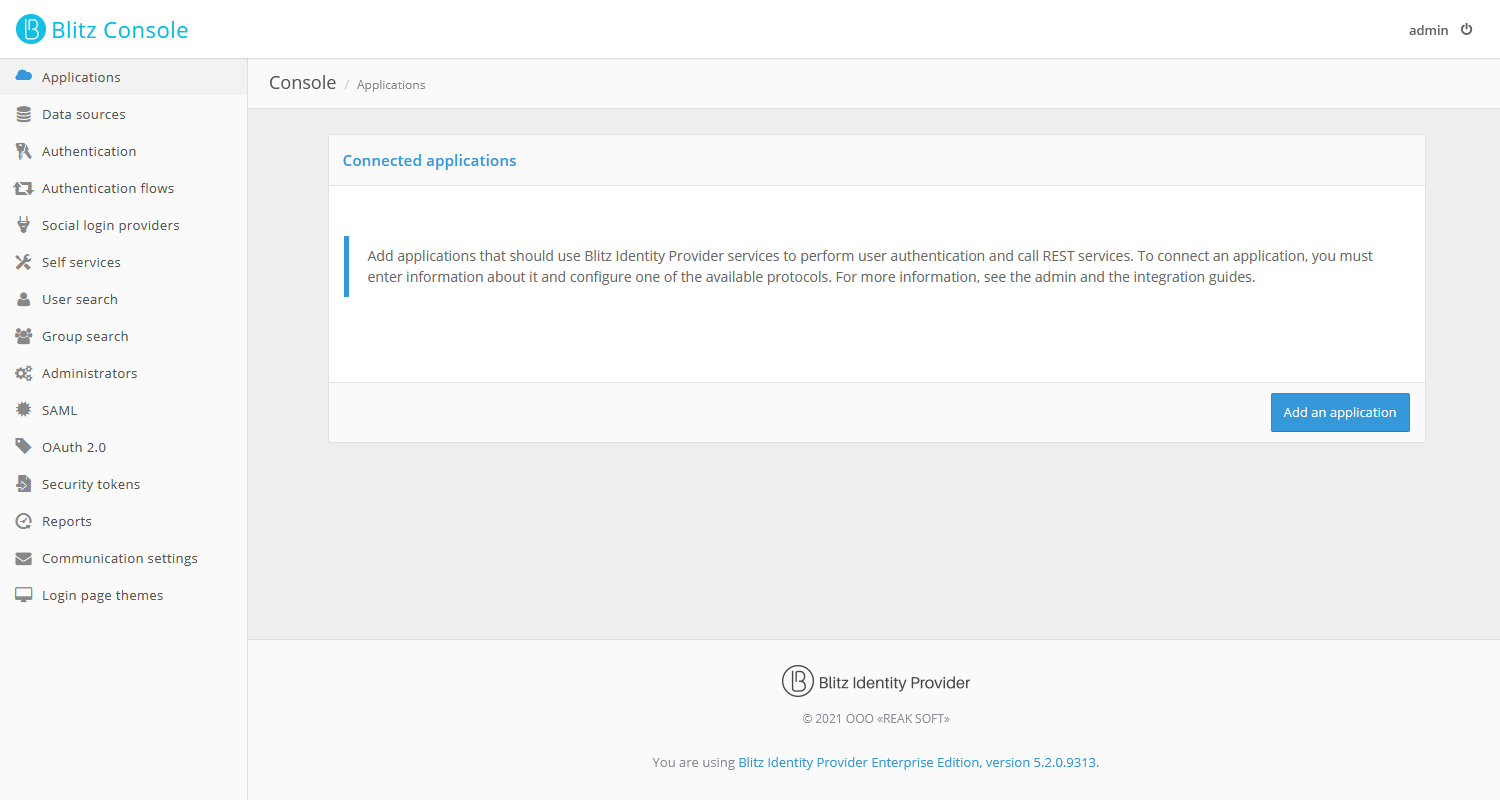
View of the main screen of the control console
License key installation#
If you click on the You are using Blitz Identity Provider …, version … link in the footer of any Blitz Identity Provider Admin console page, the screen below will be displayed.
On this screen, you can view the version number of your current Blitz Identity Provider, go to the software documentation site, and the feedback form.
In the License information block you can see the license expiration date and the maximum number of applications allowed by the license. If you click the “Change license” button, you can enter a new license key.
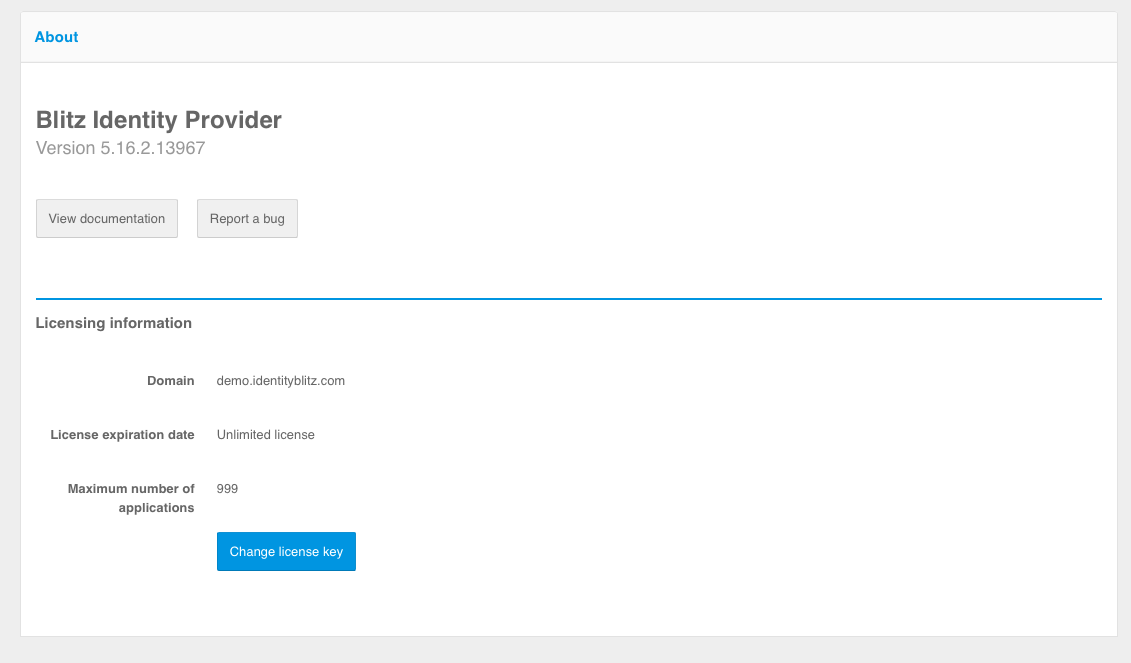
View license information
After you have installed the new license key it is recommended that you restart Blitz Identity Provider applications.
You can also set the license key by editing the blitz.conf configuration file in the /usr/share/identityblitz/blitz-config directory. You need to find the blitz.prod.local.idp.license configuration block and adjust it as follows (set the license key in the key parameter):
"license" : {
  "key" : "MEQC…U"
}
Administrator account management#
After installing Blitz Identity Provider, it is recommended that you create additional administrator accounts, assign passwords and administrative roles to them. You can manage administrator accounts in the “Administrators” section.
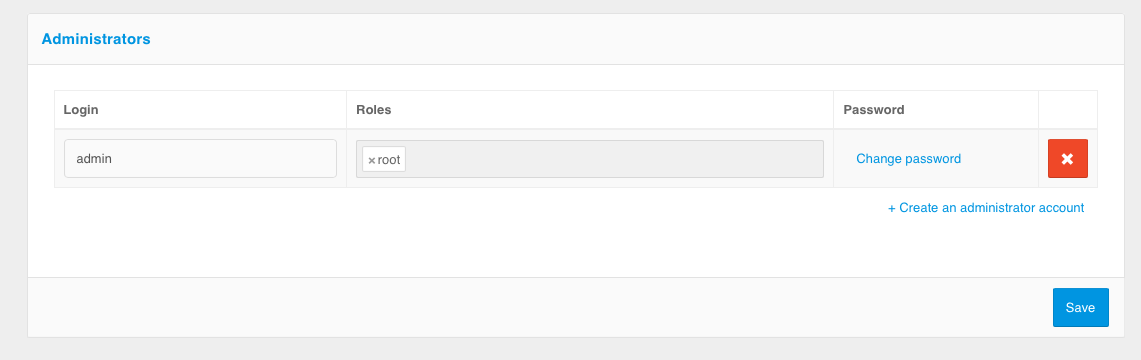
Administrators management
The following actions are available under “Administrators” section:
creation and deletion of administrator accounts;
change of the administrator account passwords;
assignment and revoke of administrator functions.
By default, the roles listed in the table are available in Blitz Identity Provider. You can reconfigure existing roles or create new roles through the settings in the credentials configuration file.
Standard administrator functions in Blitz Identity Provider
Function |
Available sections of the Admin console |
|---|---|
superuser ( |
Everything is accessible |
IS administrator ( |
“Administrators”, “Events” |
system administrator ( |
“Data sources”, “Authentification”, “Authentification flows”, “Social login providers”, “SAML”, “OAuth 2.0”, “Devices”, “Messages” |
application administrator ( |
“Applications” |
Interface administrator ( |
“Self services”, “Login page themes” |
TA administrator ( |
“User search”, “Group search”, “Access rights”, “Events” |
In addition to the standard identification and authentication of administrators by login and password when logging into the admin console, it is possible to configure the use of identification and authentication of users to the admin console using the Blitz Identity Provider Authentication server. The settings are made through the console.conf configuration file.
Restarting Blitz Identity Provider applications#
To restart Blitz Identity Provider applications you must use the command:
systemctl restart APP_NAME
Instead of APP_NAME, you must specify the name of the application to be restarted: blitz-console, blitz-idp, blitz-registration, blitz-recovery, blitz-keeper.
Example of a command to restart an authentication service application:
systemctl restart blitz-idp