User administration#
User account management#
In the “Users” section of the admin console, the Blitz Identity Provider administrator can:
search for user accounts;
add a user account;
view and edit user account attributes;
change the user account password;
view and unbind the accounts of external identity providers;
bind devices for two-factor authentication;
view the groups the user is included in, manage the user’s membership in the groups;
view and delete the user’s devices;
view, bind, delete user security keys;
view user account permissions, assign and revoke permissions;
view the user’s permissions granted to applications;
delete the user account.
The general view of the User Data Management page is shown in the figure below.
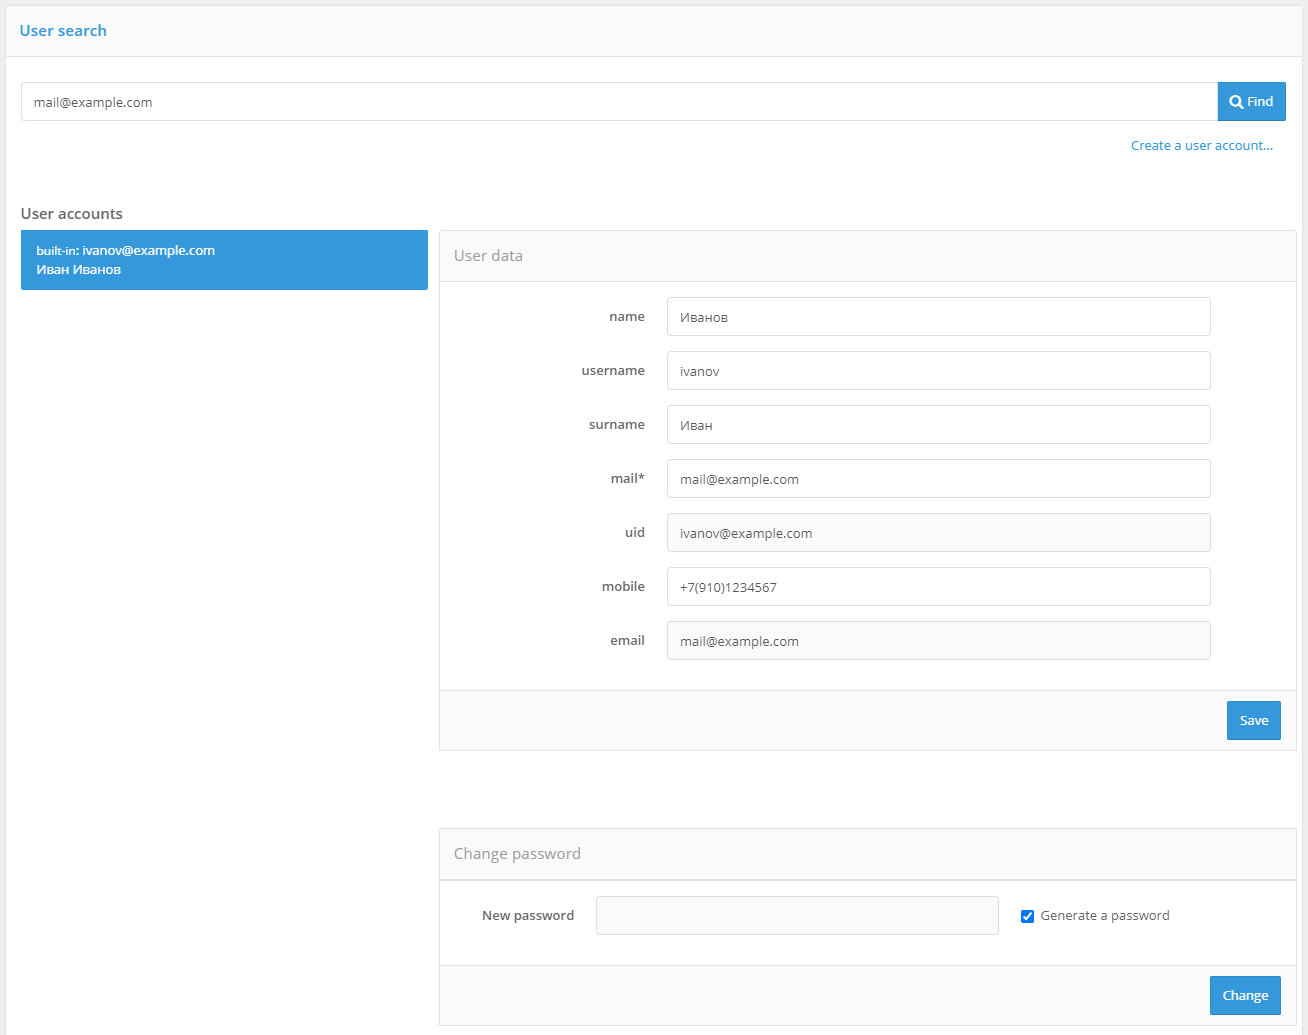
View of the user admin page
Searching for user accounts#
To search for users, enter the user ID and click the “Search” button. The attribute is used as the displayed identifier, defined in the “Data sources” section as the base identifier, as well as attributes marked as search attributes.
The list of users found contains:
identifier of the found user;
store where user was found;
user name, configured in the “Data sources” section.
Clicking on any of the found accounts opens the information details of the user.
Also available:
when you click link copy button, the link to the found user will be copied to the clipboard;
the link “Security events” allows you to quickly view security events for the current day, in which the found user appears as an access object.
Adding a user account#
To add a new account, click on the “Create a user account…”. In the opened window:
specify the store where user data should be saved;
set all required attributes;
click on the “Create” button.
Important
During account creation, you should consider the datastore configurations and restrictions. For example, if the record is saved to an LDAP directory, all mandatory attributes must be filled in, attribute uniqueness restrictions must not be violated, etc. From the Blitz Identity Provider’s point of view, only the identifier and mandatory attributes are mandatory (the corresponding attributes are marked with an asterisk (*)).
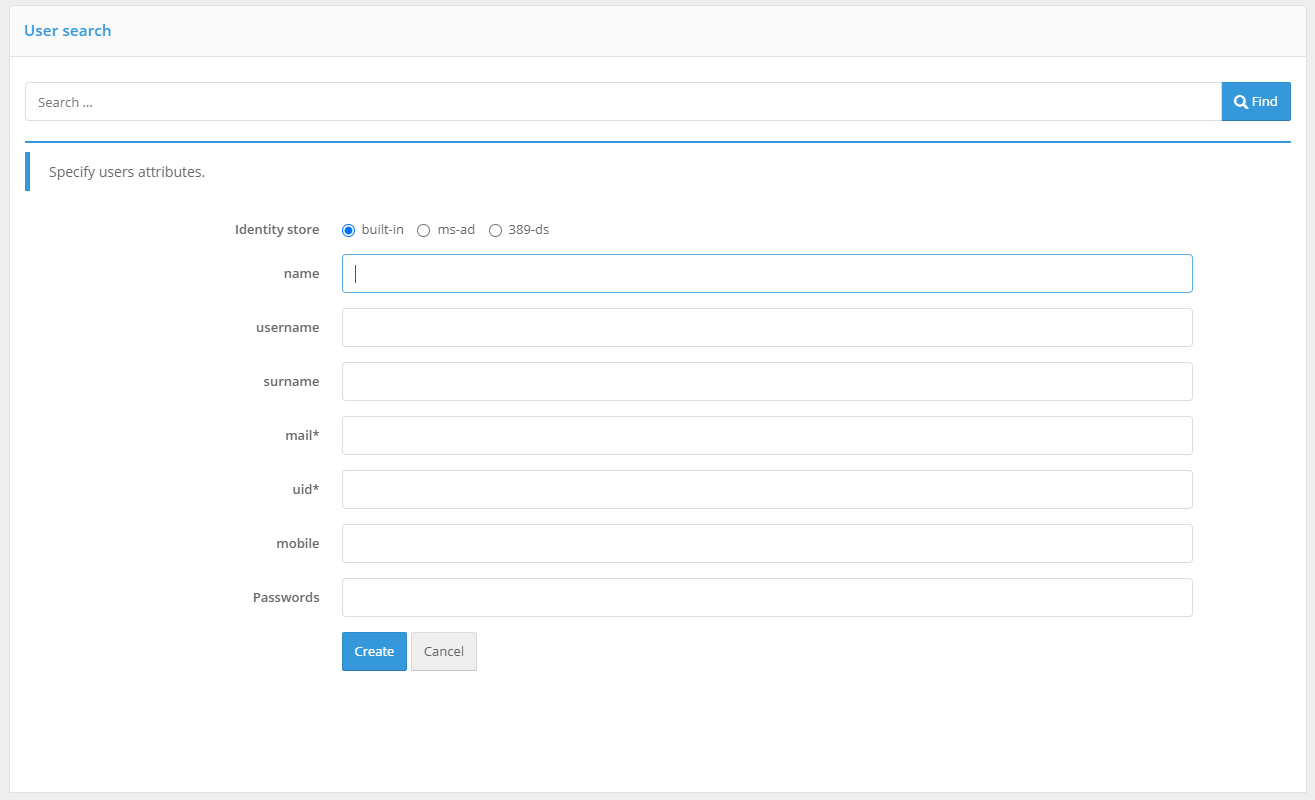
Create a user account
View and edit user attributes#
To display information on any found user, click on the identifier of the user. It contains the attribute values that were defined in the section “Data sources”, as well as linked accounts of external identity providers, user devices, security keys, etc.
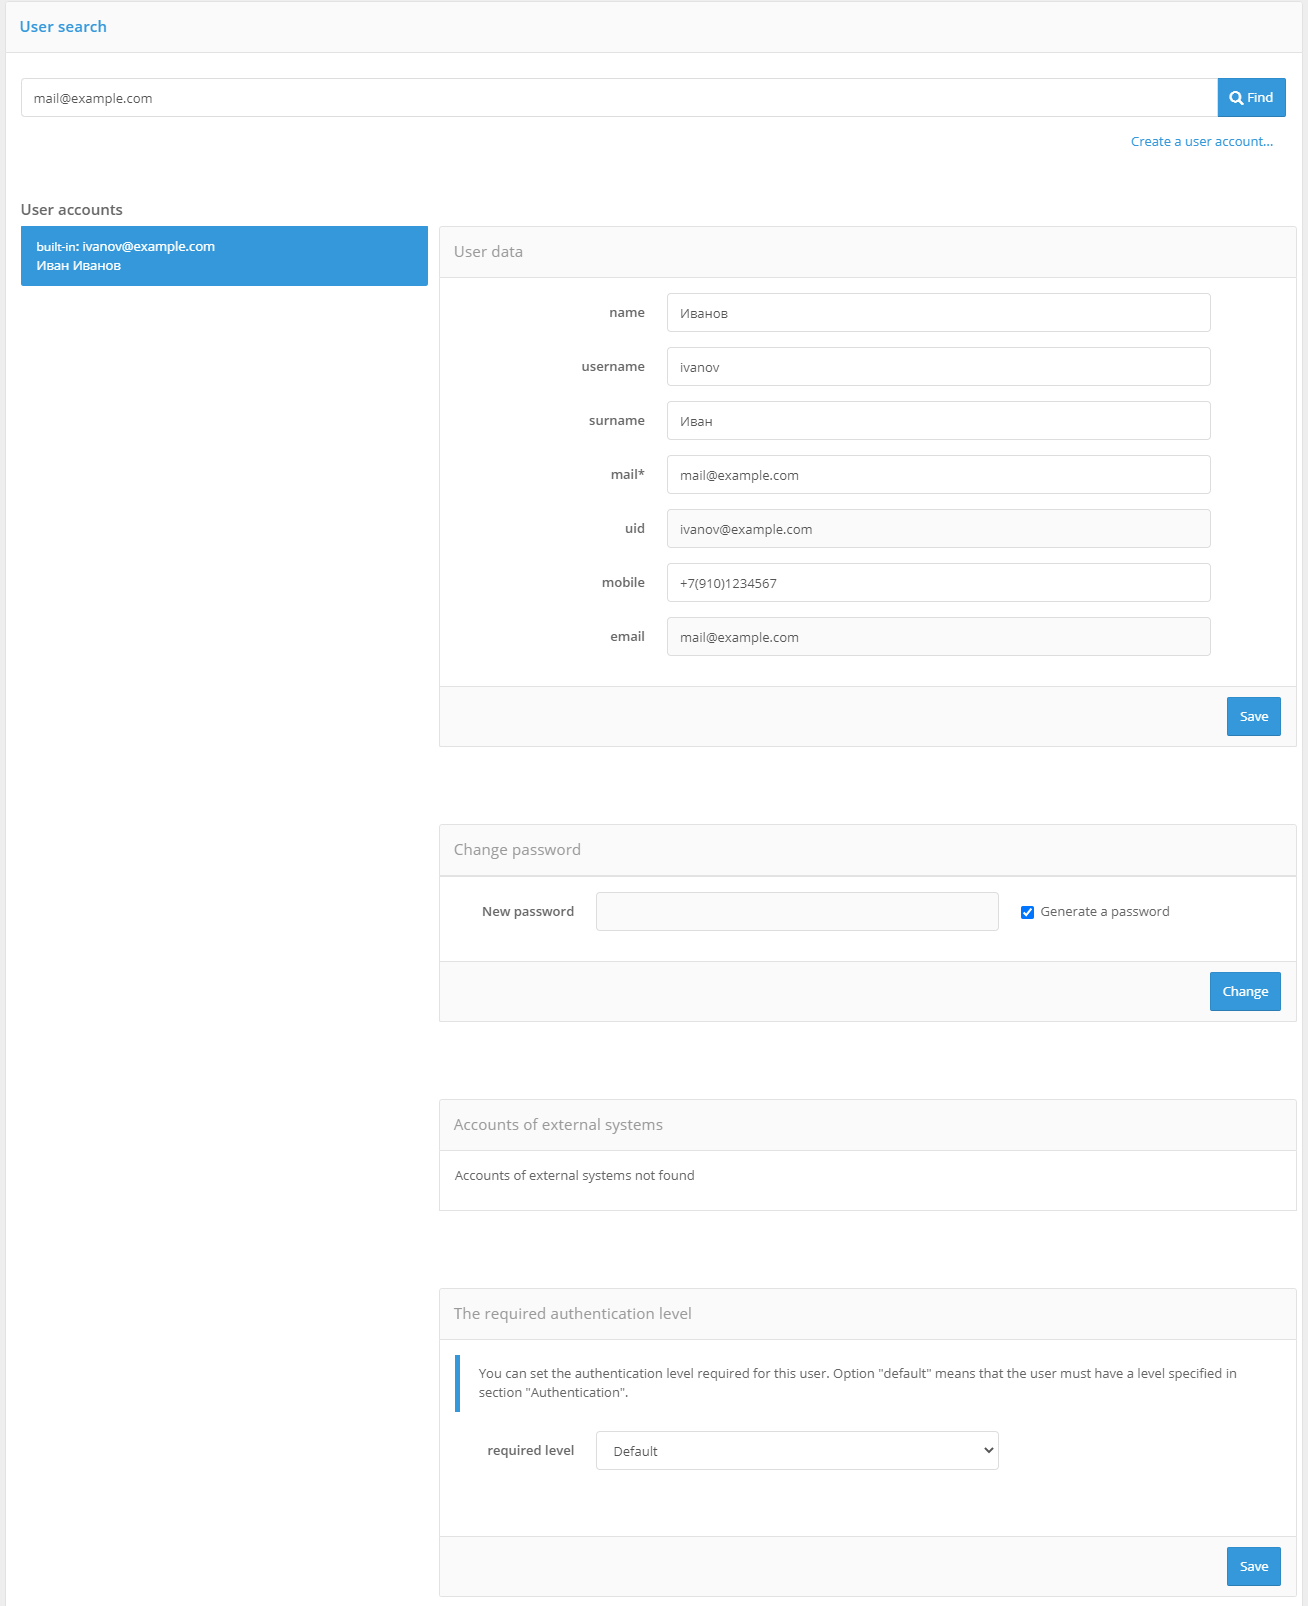
Viewing user information (excerpt)
You can perform the following operations in the user card:
edit user attributes;
change the password;
view the list of bound accounts of external authentication providers, unbind external accounts;
change the required authentication level for the user;
bind or remove authentication devices: one-time password generators and mobile apps to receive push notifications;
view the groups the user is included in;
view the user’s rights and the rights that are available for that user;
view and delete saved user’s devices and browsers;
view, add, and delete user security keys;
view and delete scopes granted to applications.
Editing user attributes#
Administrators can change any attribute of the user when viewing the card of the selected user account. Note, when editing an account, be aware of the datastore configurations and restrictions to which the record is being written.
Note that changing data via the attribute editing interface disregards the rules used in the user self-registration process. For example, changing the e-mail address or cell phone number does not require confirmation.
Changing user password#
To change the password, use the block “Change password“ . New password can be entered manually or generated - for this purpose it is necessary check in the “Generate a password” checkbox. The new password will be displayed in the information block of successful operation.
When setting a new password manually, take into account the limitations of the password policy of the store where you are saving the password.
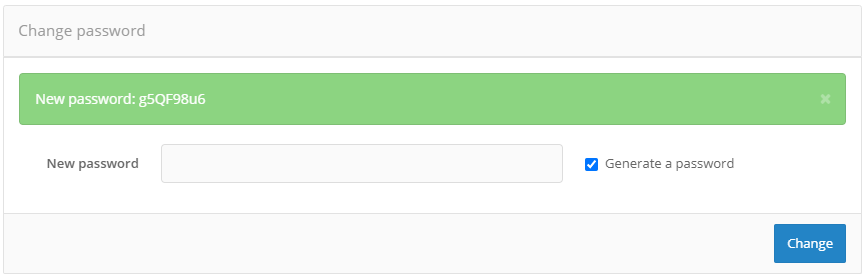
Changing the password
Viewing and undinding the accounts of external identity providers (IdPs)#
In the block «Accounts of external systems», you can view the list of accounts of external identity providers (social networks, etc.) bound to the account of the found user. Each binding is characterized by a unique identifier, where the last part is the internal identifier of the account in the corresponding identity provider.
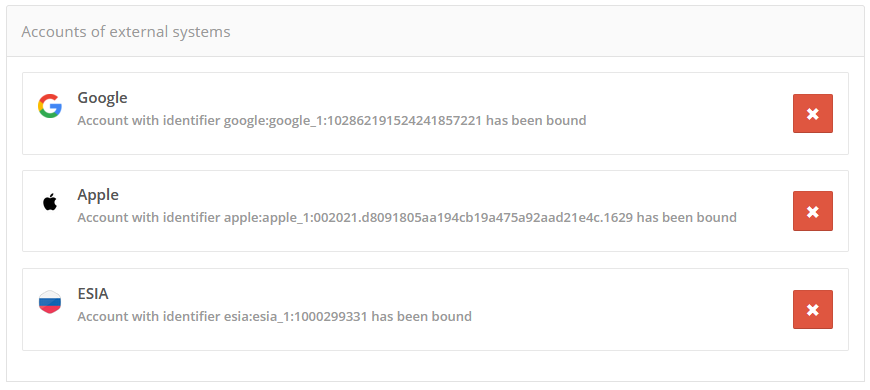
View user information: bound external provider accounts
Binding of devices for two-factor authentication with one-time password#
The administrator can bind a two-factor authentication tool to the selected user account. For example, a hardware HOTP/TOTP generator can be bound by serial number, or a mobile application that generates TOTP codes can be bound to the account by QR code.

Binding of HOTP device by serial number by administrator
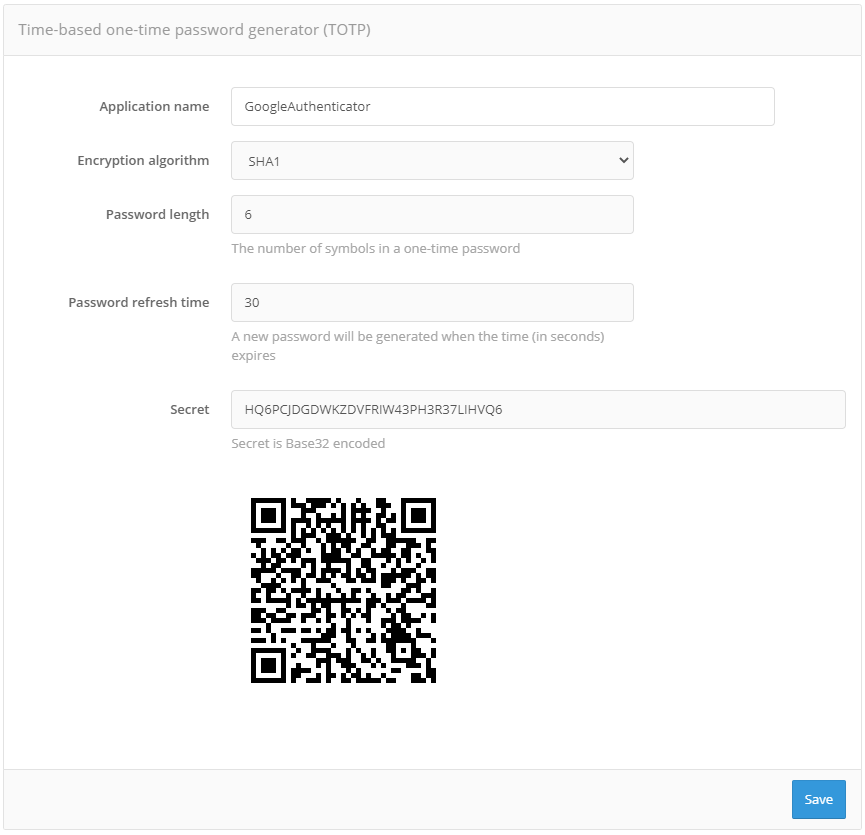
Binding of TOTP application by QR code by administrator
Binding the Duo Mobile App#
To make authentication via Duo Mobile, it is necessary to bind the mobile application to the user account. The recommended scenario is that the user binds their mobile app to the user’s account in the “User profile” web application.
Another way to bind is via the admin console. To do this, it is necessary to find the necessary account in the “Users” section and the settings block “Duo Mobile application (QR code)”. In this block, click on the “Attach Duo Mobile” button, then scan the displayed QR code with the Duo Mobile mobile application.
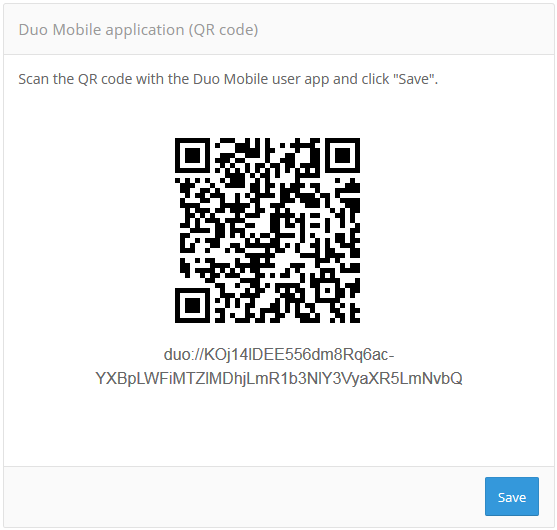
Binding the Duo Mobile App
Viewing the user’s groups he included in, manage the user’s membership in groups#
If the user is included in groups, this information will be displayed in the block “Group membership”. The following data will be displayed for each group:
group identifier;
group attribute values.

Viewing user groups
To exclude a user from a group using the delete button or add a user to another group use the “Add to group” link. To add a user to a group, you will need to enter the value of the attribute identifying the group, click the “Search” button, select the appropriate group from the list of found groups, and click the “Add” button.
Viewing, assigning and revoking rights#
If the user has rights to the user from applications or other accounts, this will be displayed in the “Rights of subjects on user” block. If the user has rights over objects, such as other accounts, this will be displayed in the *”User object permissions” block.
Each right is characterized by the following parameters:
object identifier;
name;
right.
You can revoke an access right using the delete button next to the access right. You can assign an access right using the “Assign rights” link. In this case you will have to select the assigned access right from the list, select the type of subject (user or application) or object (user, group or application), find and select the subject/object.
Viewing and deleting memorized devices and browsers#
The administrator can view the devices and browsers the user has logged in using their account from. The description of devices includes:
an indication of whether the device has a login session saved and whether the device is trusted. The indication is color coded:
gray - the login session is not saved on the device and the device is not trusted;
yellow - the login session is not saved on the device, but the device is trusted;
blue - a login session is saved on the device, but the device is not trusted;
green - the login session is saved on the device and the device is trusted.
the name and operating system version of the device, determined from
UserAgent;the browser name and version defined based on
UserAgent;the date and time of the last login from this device and browser;
The IP address of the user that was determined the last time the user logged in from this device and browser.
Security key management#
The administrator can view the list of security keys (Passkey, WebAuthn, FIDO2, U2F) registered for the user account. For each security key, the following are listed:
key name;
date and time of key registration;
scope of application (for Passkey and FIDO2 - for login and for login confirmation; for U2F - for login confirmation only);
date and time of the last use of the key.
The administrator can register a new security key using the “Add key” link. In a typical usage scenario, security keys are added by the user himself at the moment of login (onboarding) or via his personal cabinet.
The ability for an administrator to add a key can be useful in the following scenarios:
The administrator personally issues users a hardware FIDO2/U2F key and binds it to the account. Two-factor authentication is used to access the company’s applications.
The administrator needs the ability to log in to the user account for technical support purposes. Resetting the password from the account will inconvenience the user - instead, a security key can be registered and used to log in. All actions to register and delete security keys are logged as security events.
Viewing and deleting permissions granted to applications#
The administrator can view a list of permissions granted by the user to applications.
Each permission is described by:
identifier of the application;
list of permissions (
scope);date when the permissions were granted.
Managing user groups#
If Blitz Identity Provider is configured to work with user groups (see Configuring user groups), the “Groups” section will appear in the admin console. In this section you can search for groups by one of the configured attributes, edit groups, create and delete groups, and manage user membership in groups.
For each group found, its attributes are displayed. In addition, the “Group members” block displays all users included in the group. For each user is displayed:
user identifier;
user name - according to the template defined in the “Data sources” section (“User name in the console”).
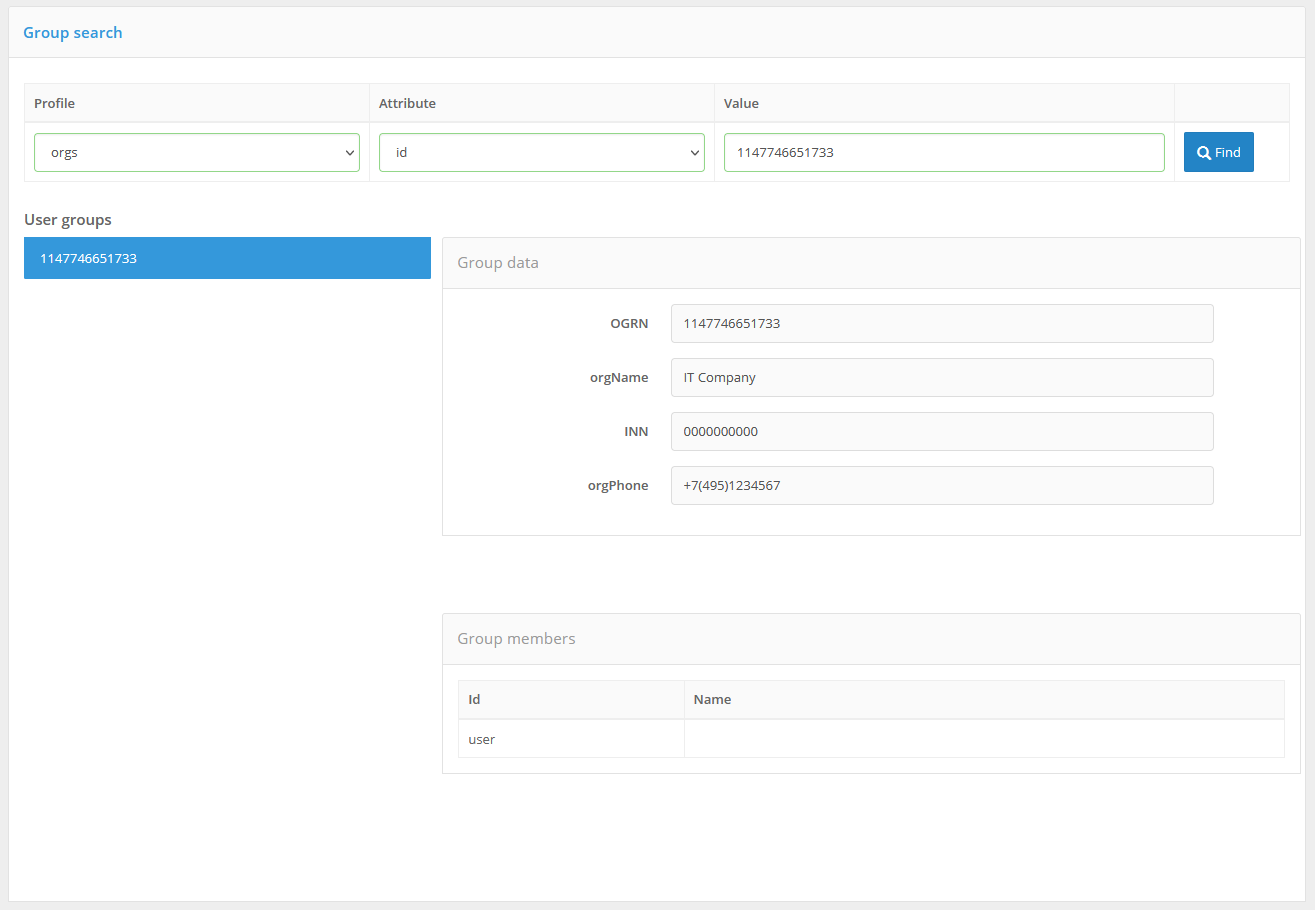
Viewing user groups
You can edit group attributes, delete a group, add users to a group using the “Add member…” link, exclude a user from a group, and create new user groups using the “Create group…” link.
Access rights management#
To maintain a directory of access rights in Blitz Identity Provider, use the “Access rights” section of the admin console. Access rights can be used to control user access to applications, to control the invocation of protected REST services by applications, and can be requested and used by applications to control user access to application functions.