Configuring SAML and WS-Federation#
Connection via SAML 1.0/1.1/2.0#
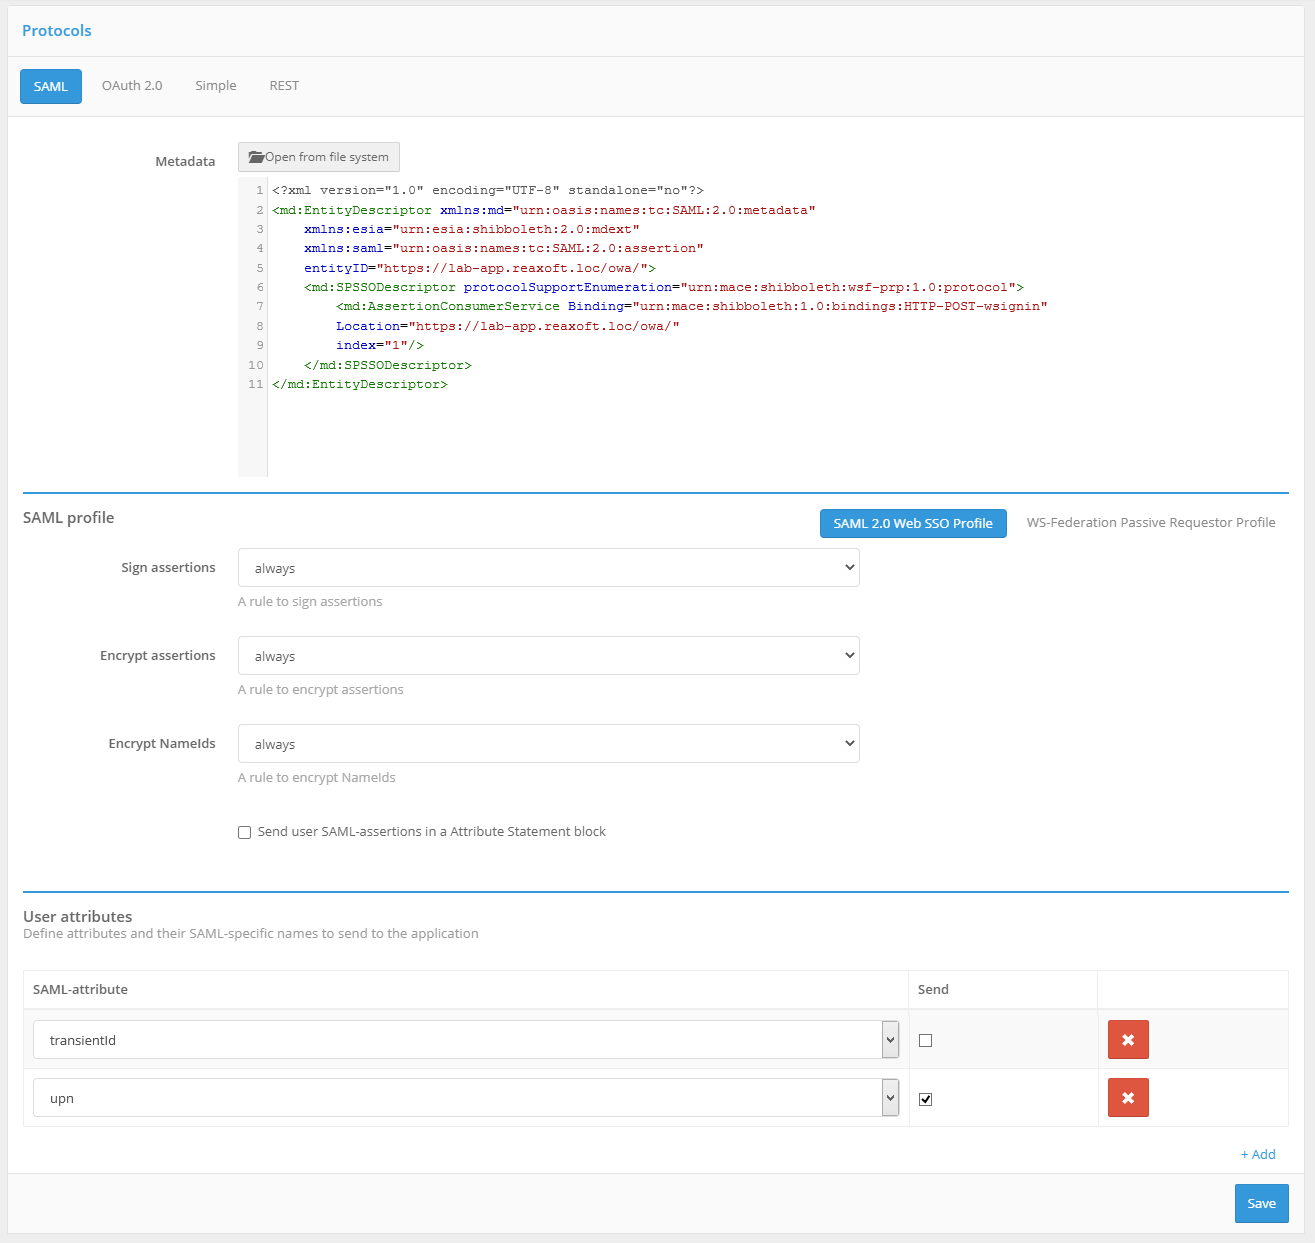
When connecting an application via SAML, you must make the following settings:
make sure that the SAML Profile switch is set to SAML 2.0 Web SSO Profile;
in the SAML profile block, click Configure. In the fields that appear, specify:
specify whether to sign SAML attributes (
SAML Assertions) in Blitz Identity Provider responses;specify whether to encrypt SAML-attributes in Blitz Identity Provider responses;
specify whether to encrypt SAML identifiers (
SAML NameIds) in Blitz Identity Provider responses;specify whether to include a list of assertions with attributes in Blitz Identity Provider responses;
specify which SAML user attributes from Blitz Identity Provider to pass to the application. SAML attributes must be pre-configured in the SAML section of the Admin Console.
Connection via WS-Federation#
When connecting an application via WS-Federation, the following settings must be configured:
set the SAML profile switch to WS-Federation Passive Requestor Profile;
in the SAML profile block, click Configure. In the fields that appear, specify:
specify whether to sign assertions (
Assertions) in Blitz Identity Provider responses;specify the lifetime of assertions in the response. ISO 8601 format should be used to specify the duration of the period, e.g.
PT5M- 5 minutes;specify whether to include a list of assertions with attributes in Blitz Identity Provider responses;
specify which user attributes from Blitz Identity Provider to pass to the application. Attributes must be pre-configured in the SAML section of the Admin Console.

Uploading SAML metadata#
You can use either method to upload SAML metadata of an application:
To upload a ready-made XML file, click Open file.
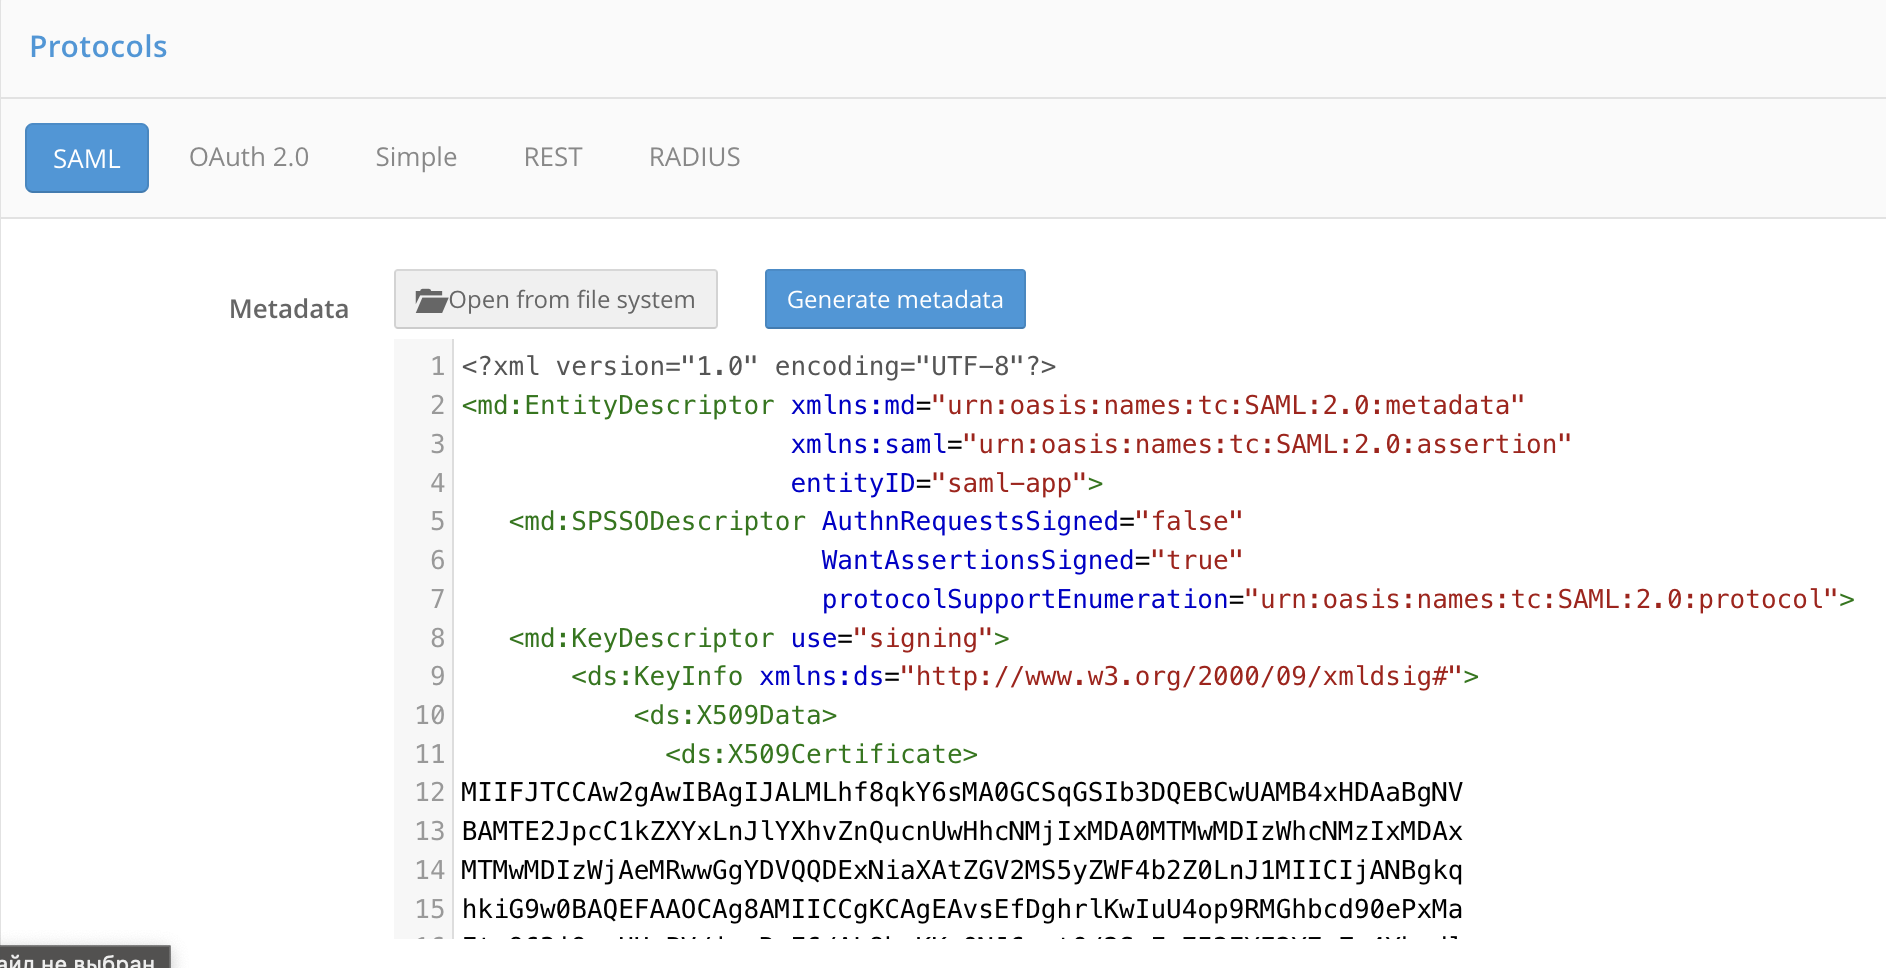
To use the metadata builder, click Generate metadata. Enter the following data:
The assertion handler service URL (
AssertionConsumerService),The single logout service URL (
SingleLogoutService),Signature certificate,
Encryption certificate.
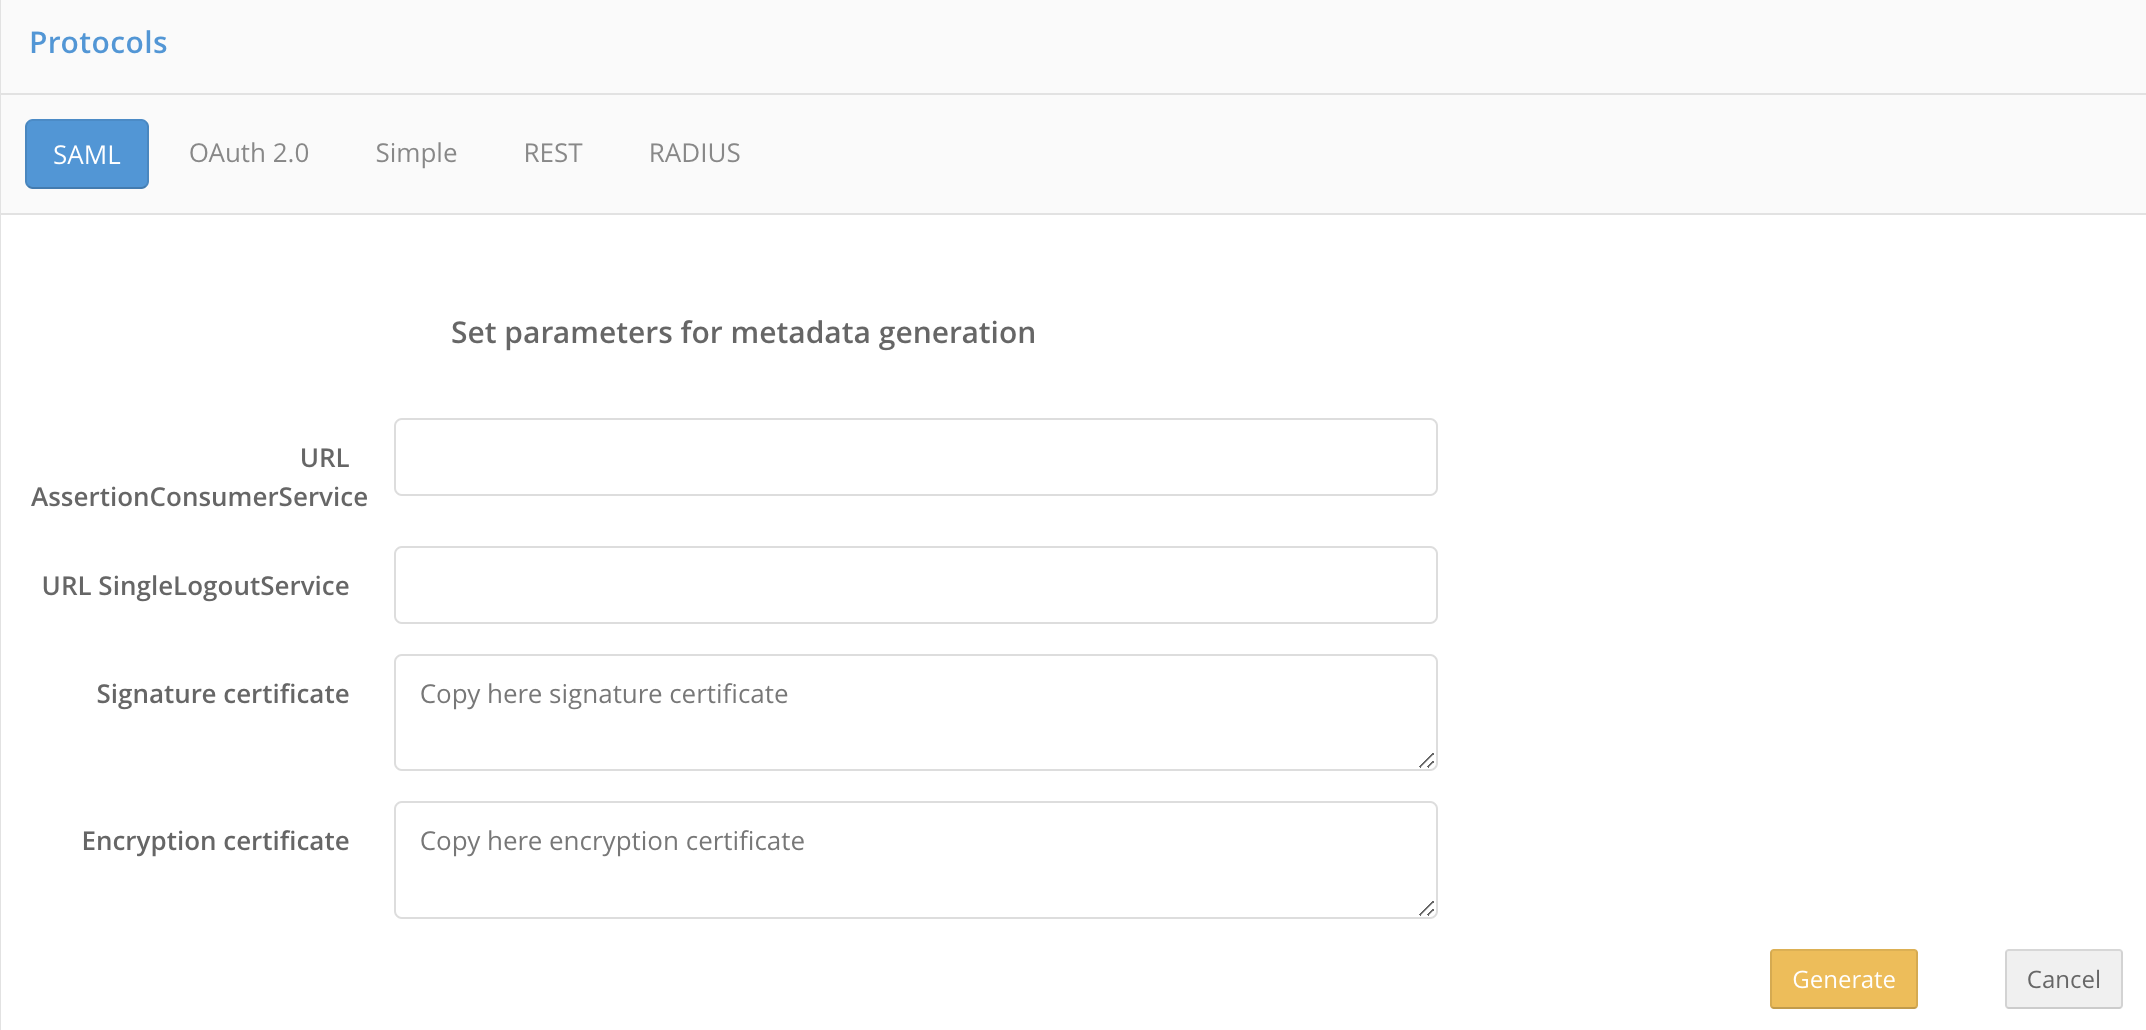
Click Generate. As a result, the metadata file will be automatically generated based on the entered data.
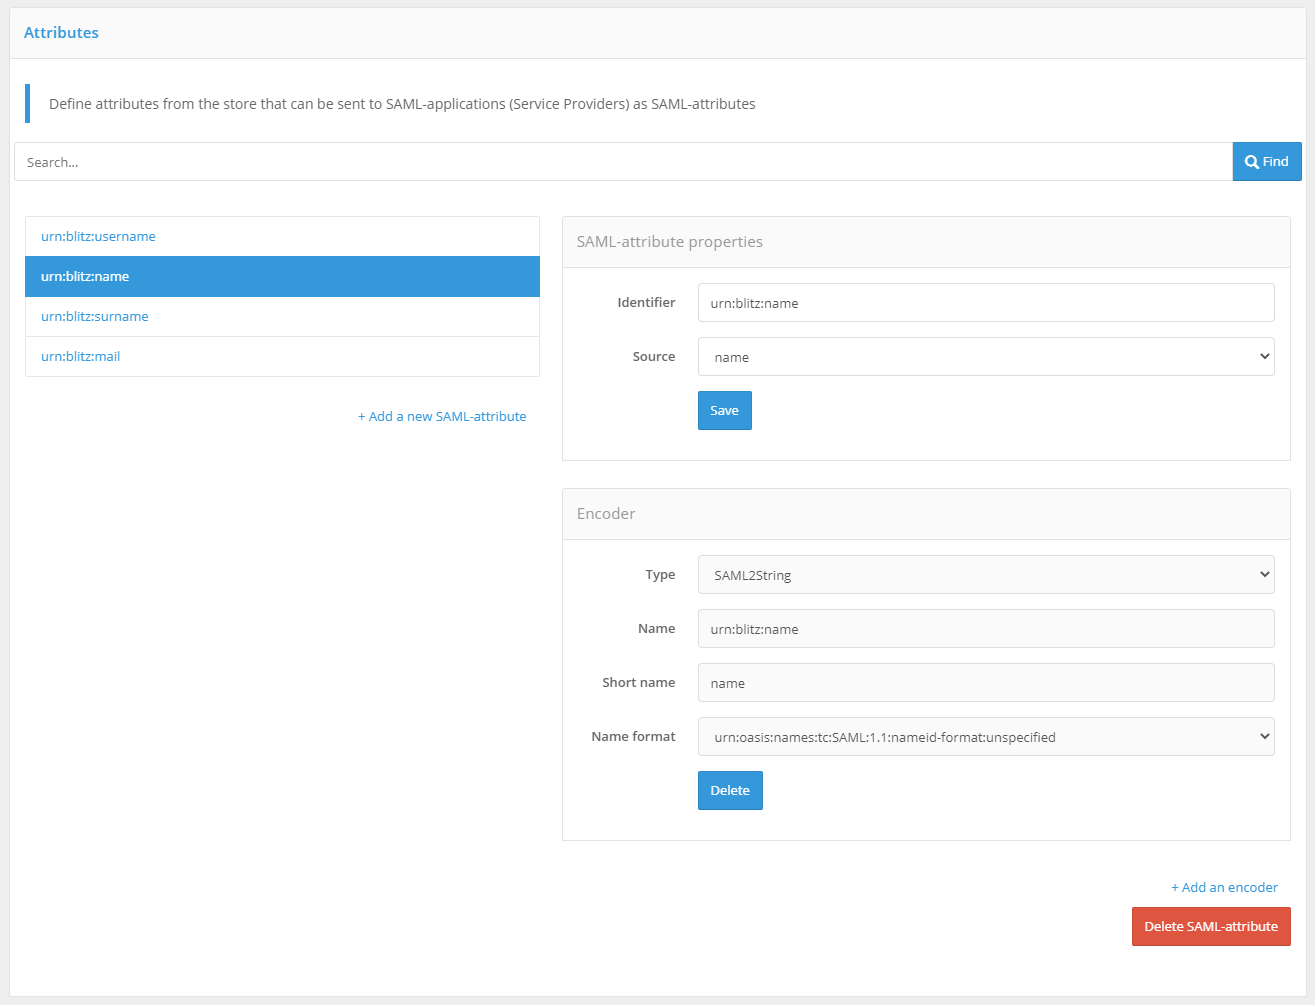
Configuring SAML attribute#
The SAML section of the Admin Console is used to register user SAML attributes in Blitz Identity Provider.
To add a new SAML-attribute you must:
Click on the Add a new SAML attribute link.
Enter:
name of the SAML-attribute (this is what will be displayed when connecting SAML applications);
attribute source (all attributes defined in the Data sources section are displayed).
Press Add. The attribute will be added.
Define attribute encoders. This requires:
click on the link Add encoder;
choose the type of encoder; it should be noted that the type of encoder depends on the protocol version the service provider (connected application) works with;
name of the SAML attribute that will be sent to the service provider (within this encoder type);
a short name to be given to the service provider (within this encoder type);
name format.
If necessary, multiple encoders of the selected SAML attribute can be defined (each encoder must belong to a different encoder type).