User registration#
User registration is a web application that allows a user to create his/her own account. Registration setup includes configuring the registration form, changing the service parameters and creating a registration procedure (optional).
Registration form#
The list of requested user data is defined by the HTML template. The template is a text file that is compiled using the Twirl templating engine. It is necessary to set functions in the template that allow the user to enter data about himself when registering.
Examples of functions available in the template:
@attrInput("email", msg("reg.email"), Map("placeholder" -> "mail@example.com", "error-messages" -> msg("reg.email.wrong"), "input-type" -> "mail"))- displays on the page a field for entering theemailattribute described in the system.msg("reg.email")is the name of the attribute, which is taken from the message file according to the current locale. If the input field is empty, it displays"mail@example.com"as a hint, and if the input is incorrect, it displaysmsg("reg.email.wrong")from the message file. Theinput-typeequal tomailis set for the element;@attrInput("family_name", "Last name", Map("placeholder" -> "Last name", "error-messages" -> "Error"))- displays on the page the field for entering the user’s last name into thefamily_namevariable. This variable can be further used when executing the registration procedure.@securityQuestionInput– displays the input fields of the security question and the answer to the security question on the page;@passwordsInput- displays the password and password confirmation fields on the page;@agreement- displays the link to the User agreement;@attrExpr- the function, which allows to create a computed attribute (or assign a constant value to the attribute);@submitButton- displays the Register button.
An example of the template for registration:
@attrInput("family_name", "Last name", Map("placeholder" -> "Last name", "error-messages" -> "Error"))
@attrInput("given_name", "Name", Map("placeholder" -> "Name", "error-messages" -> "Error"))
@attrInput("phone_number", "Mobile phone number", Map("placeholder" -> "+7(999)9999999", "error-messages" -> "reg.page.mobile.req.err.msg"))
@attrInput("email", "Email address", Map("placeholder" -> "name@example.com", "error-messages" -> "reg.page.email.req.err.msg", "input-type" -> "mail"))
@passwordsInput
@agreement
@attrExpr("sub","BIP-${&random(4)}")
@submitButton
Tip
To auto-generate the GUID of the created accounts, use the following formula @attrExpr:
@attrExpr("sub","${&rUUID()}")
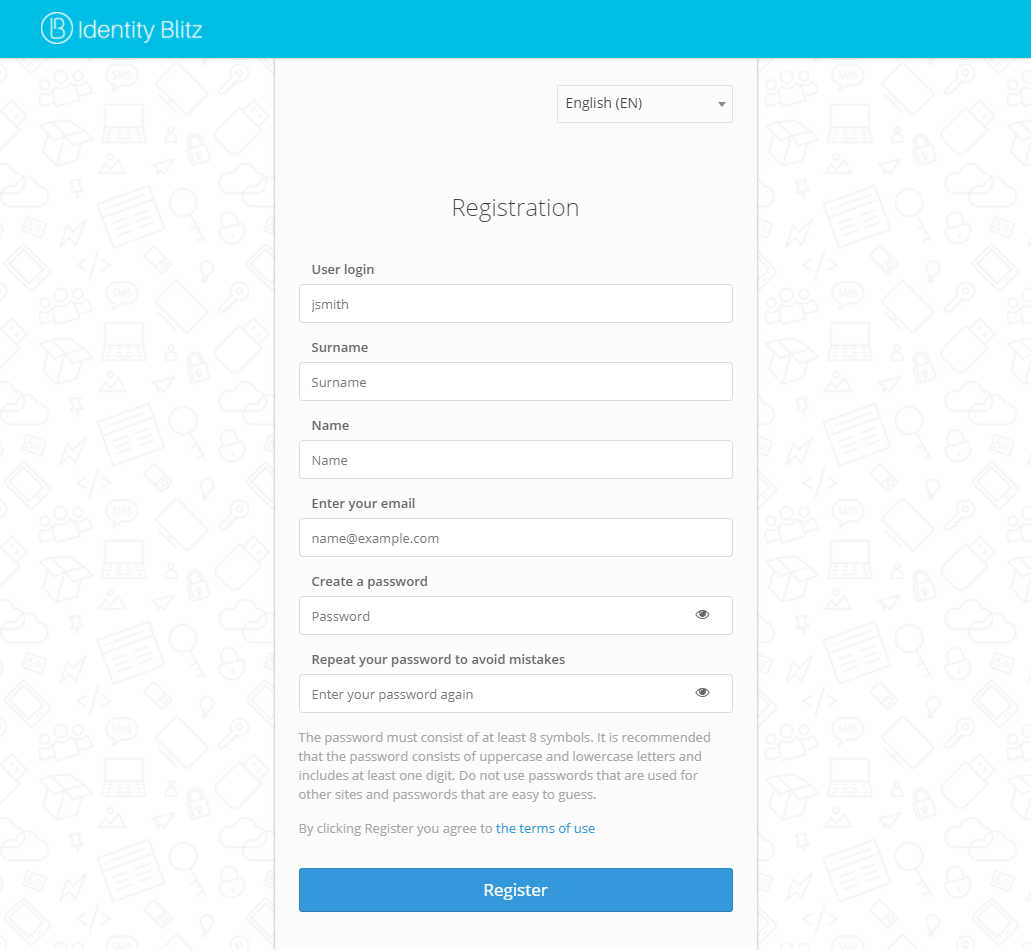
The result of using the specified template in the interface of the web-application User registration is presented in figure:
To add a drop-down list to the registration form to select attribute values from the directory:
Create the
/etc/blitz-config/custom_messages/dicsdirectory on the /project/ server;Create a
/etc/blitz-config/custom_messages/dics/dic_namefile with the directory contents (instead ofdic_name, specify the directory name, for example,company_id). Example ofcompany_idfile for the company selection drop-down directory:
001=Test company 1
002=Test company 2
003=Test company 3
The number in the directory will be written to the attribute value. The row in the directory will be shown to the user on the registration form.
Check the owner of the
dicsdirectory and the directory files in it. The owner must beblitz:blitz.
chown -R blitz:blitz /etc/blitz-config/custom_messages/dics
In the
blitz.confconfiguration file, add thedicsblock to theblitz.prod.local.idp.messagesblock. In thenamessetting, list all directory names (a separate file with directory values must be created for each directory). For example:
"dics" : {
    "dir" : "custom_messages/dics",
    "names" : [
        "company_id"
    ]
}
Restart the
blitz-registrationapplication.In the admin console, in the registration page template, add a line with the attribute filling from the directory:
@attrInput("company", msg("Company"), Map("dic" -> "company_id", "dic-default" -> "0", "sort" -> "key"))
Registration service settings#
The settings you can specify:
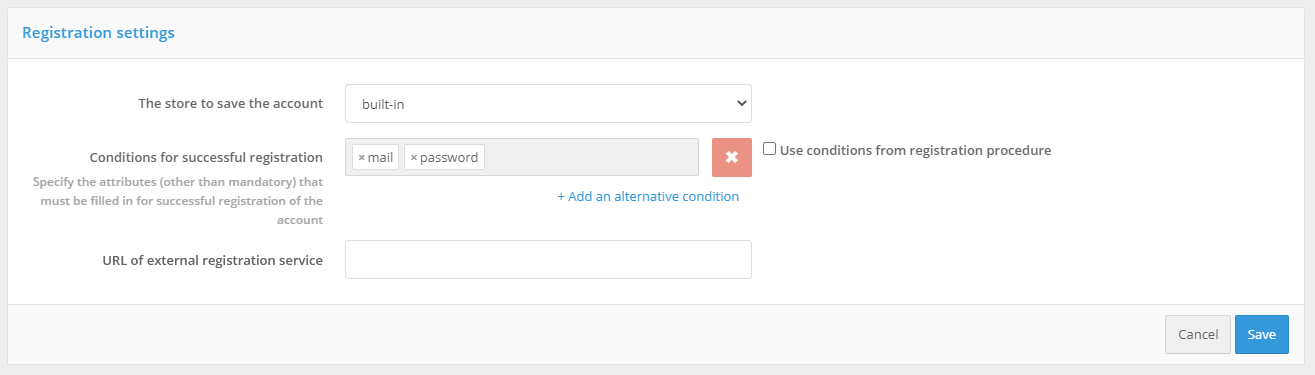
store to save the account - select one of the configured storages (section Data sources) for saving the account;
required for registration user attributes - attributes, the presence of which is necessary to complete the registration procedure. Mandatory user attributes do not need to be included in this list. It is possible to add several alternative rules. If the checkbox
Использовать условия из процедуры регистрацииis checked, the configured conditions are ignored and the conditions defined by theisEnoughfunction from the registration procedure are applied.URL of the external enrollment service. If you specify this URL as a parameter, the user will be directed to this URL when he or she proceeds to the registration process (instead of the Blitz Identity Provider registration application).
The screenshot of a fragment of the registration settings page is shown in the figure below:
Registration procedure#
Registration procedure - Java code that implements the necessary checks after the user fills in the registration form. The following actions are possible during execution of the procedure:
additional verification of the input data;
conversion of the input data;
saving attribute values in the storage;
invoking the external REST services.
If required, convert the data entered by the user and then save them as attributes, in the registration page template you should use function @attrInput instead of @textInput.
Changing the text in the User agreement#
A link to the User agreement is located on the user registration page. The User agreement is located in the assets.zip archive located in the assets directory of the Blitz Identity Provider) installation in the archived documents\user_agreement directory.
To change the User agreement, unpack the assets.zip archive, replace user_agreement_en.pdf (Russian version) and user_agreement_en.pdf (English version) with required files and archive it keeping the original structure.
It is also possible to change the reference to the User agreement. To do this, edit the line reg.page.reg.action.agreement and setPswd.page.agreement. This method is recommended if the User agreement is placed on an external resource, for example, as a separate web page.