Login via another Blitz Identity Provider setup#
To configure login through an account of another Blitz Identity Provider (for example, one installed in another organization, hereafter referred to as a trusted Blitz Identity Provider) or other identity provider that supports OIDC, follow these steps:
Open the admin console of the trusted Blitz Identity Provider (or have the administrator of another Blitz Identity Provider to do so) and perform the following operations:
go to “Appendices”;
click on the “Add an application” button;
specify the application ID, name, and domain of the application;
save the application and proceed to customizing it;
select the OAuth 2.0 connection protocol;
specify a secret (
client_secret), or leave the pre-populated option;specify the prefix of the return link, which is the URL of the main Blitz Identity Provider to be logged in to;
configure the necessary scopes in the “OAuth 2.0” section.
Go to the Blitz Identity Provider admin console and add a provider that is of Blitz Identity Provider type.
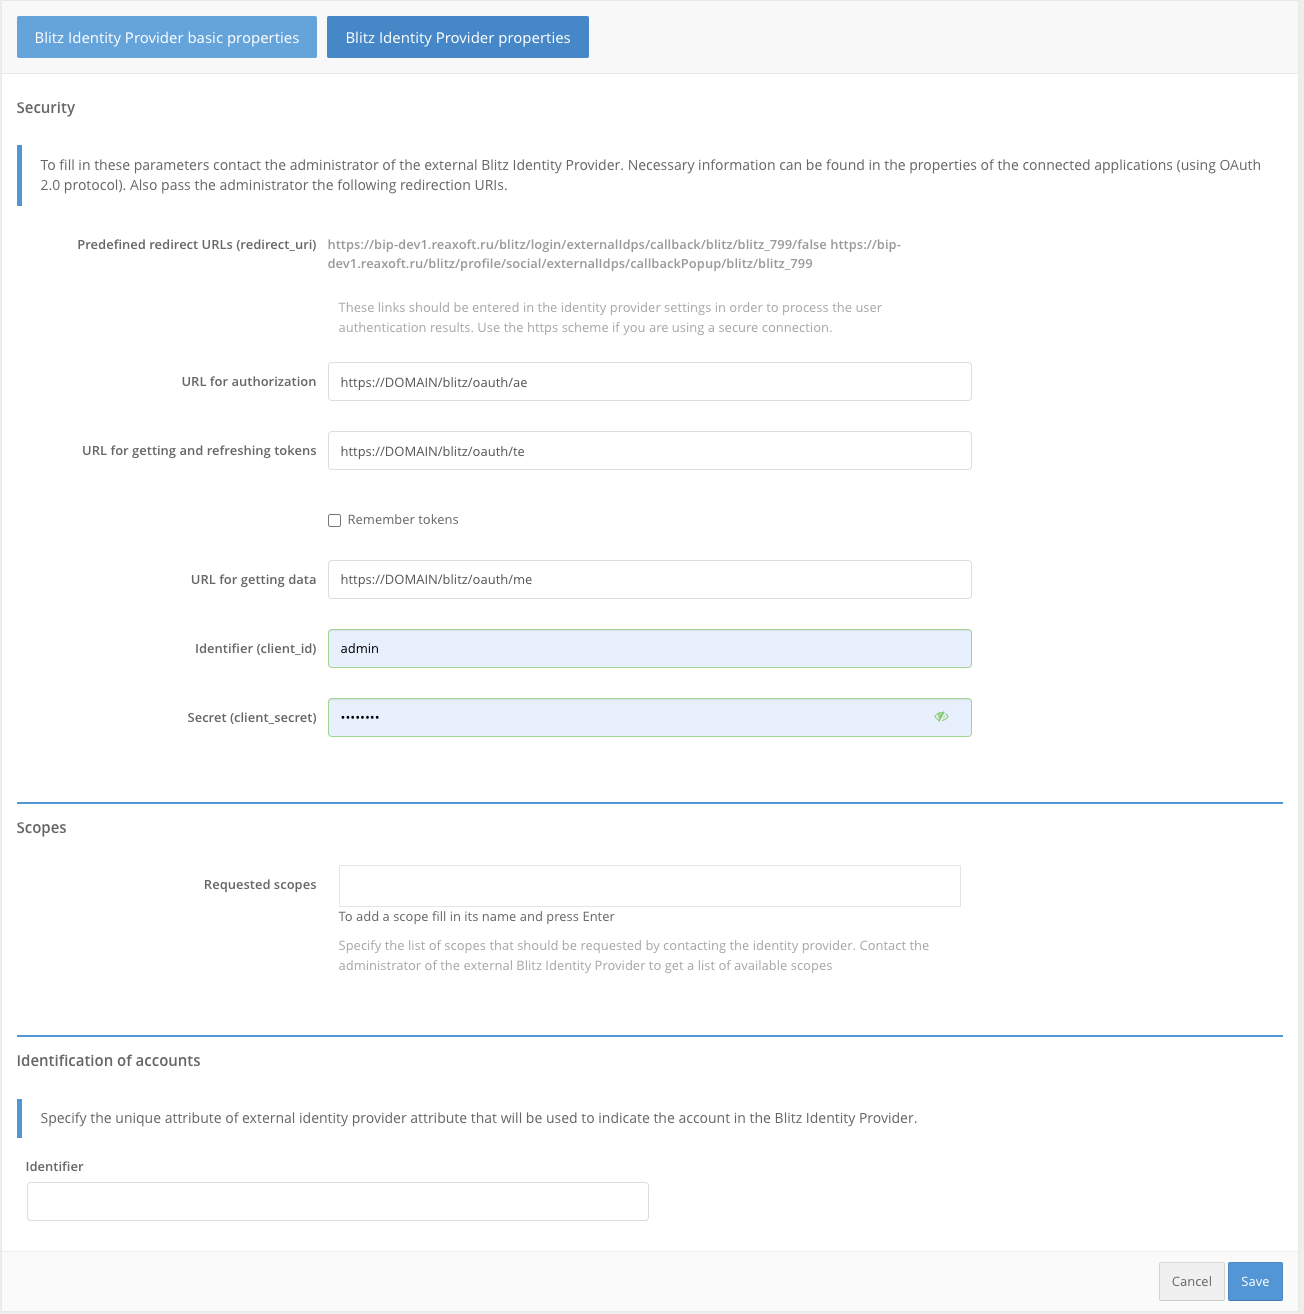
Fill in the Identity Provider settings:
Vendor Identifier;
Vendor Name;
The External Provider URI is the domain on which the trusted Blitz Identity Provider is installed;
The identifier (
client_id) specified in the trusted Blitz Identity Provider settings;The secret (
client_secret) specified in the trusted Blitz Identity Provider settings;Requested scopes, these scopes must be defined in the OAuth 2.0 section of the trusted Blitz Identity Provider;
Identifier - an attribute of the trusted Blitz Identity Provider that will be used as the user ID (ensures account uniqueness even if the attribute responsible for the username is changed);
Customize binding rules.
In the ”Authentication” section of the Management Console, enable the use of the authentication method using Blitz Identity Provider identity provider.