Confirmation by incoming call#
Blitz Identity Provider allows you to transfer one-time codes to implement the second authentication factor in the incoming call number (Flash Call method). In this case, after successful initial authentication, a call will be made to the user’s number from a previously unknown phone number, the last digits of which will need to be entered to confirm login. The call is made with the user’s permission.
To configure the Flash Call method, follow the steps described below.
Step 1. Add the method to blitz.conf#
In order for the authentication method Confirmation by Incoming call to appear in authentication methods on the tab Second factor, follow these steps:
Open the
/usr/share/identityblitz/blitz-config/blitz.conffile.sudo vim /usr/share/identityblitz/blitz-config/blitz.conf
In the settings section
blitz.prod.local.idp.login.factorsin the second list, add a block of settings using theflashCallmethod:"login" : { "factors" : [ [ … ], [ { "enabled" : false, "method" : "flashCall" }, … ] ], … }Restart the services.
sudo systemctl restart blitz-idp blitz-console blitz-recovery
Step 2. Configure the method in the console#
In the Admin Console, follow these steps:
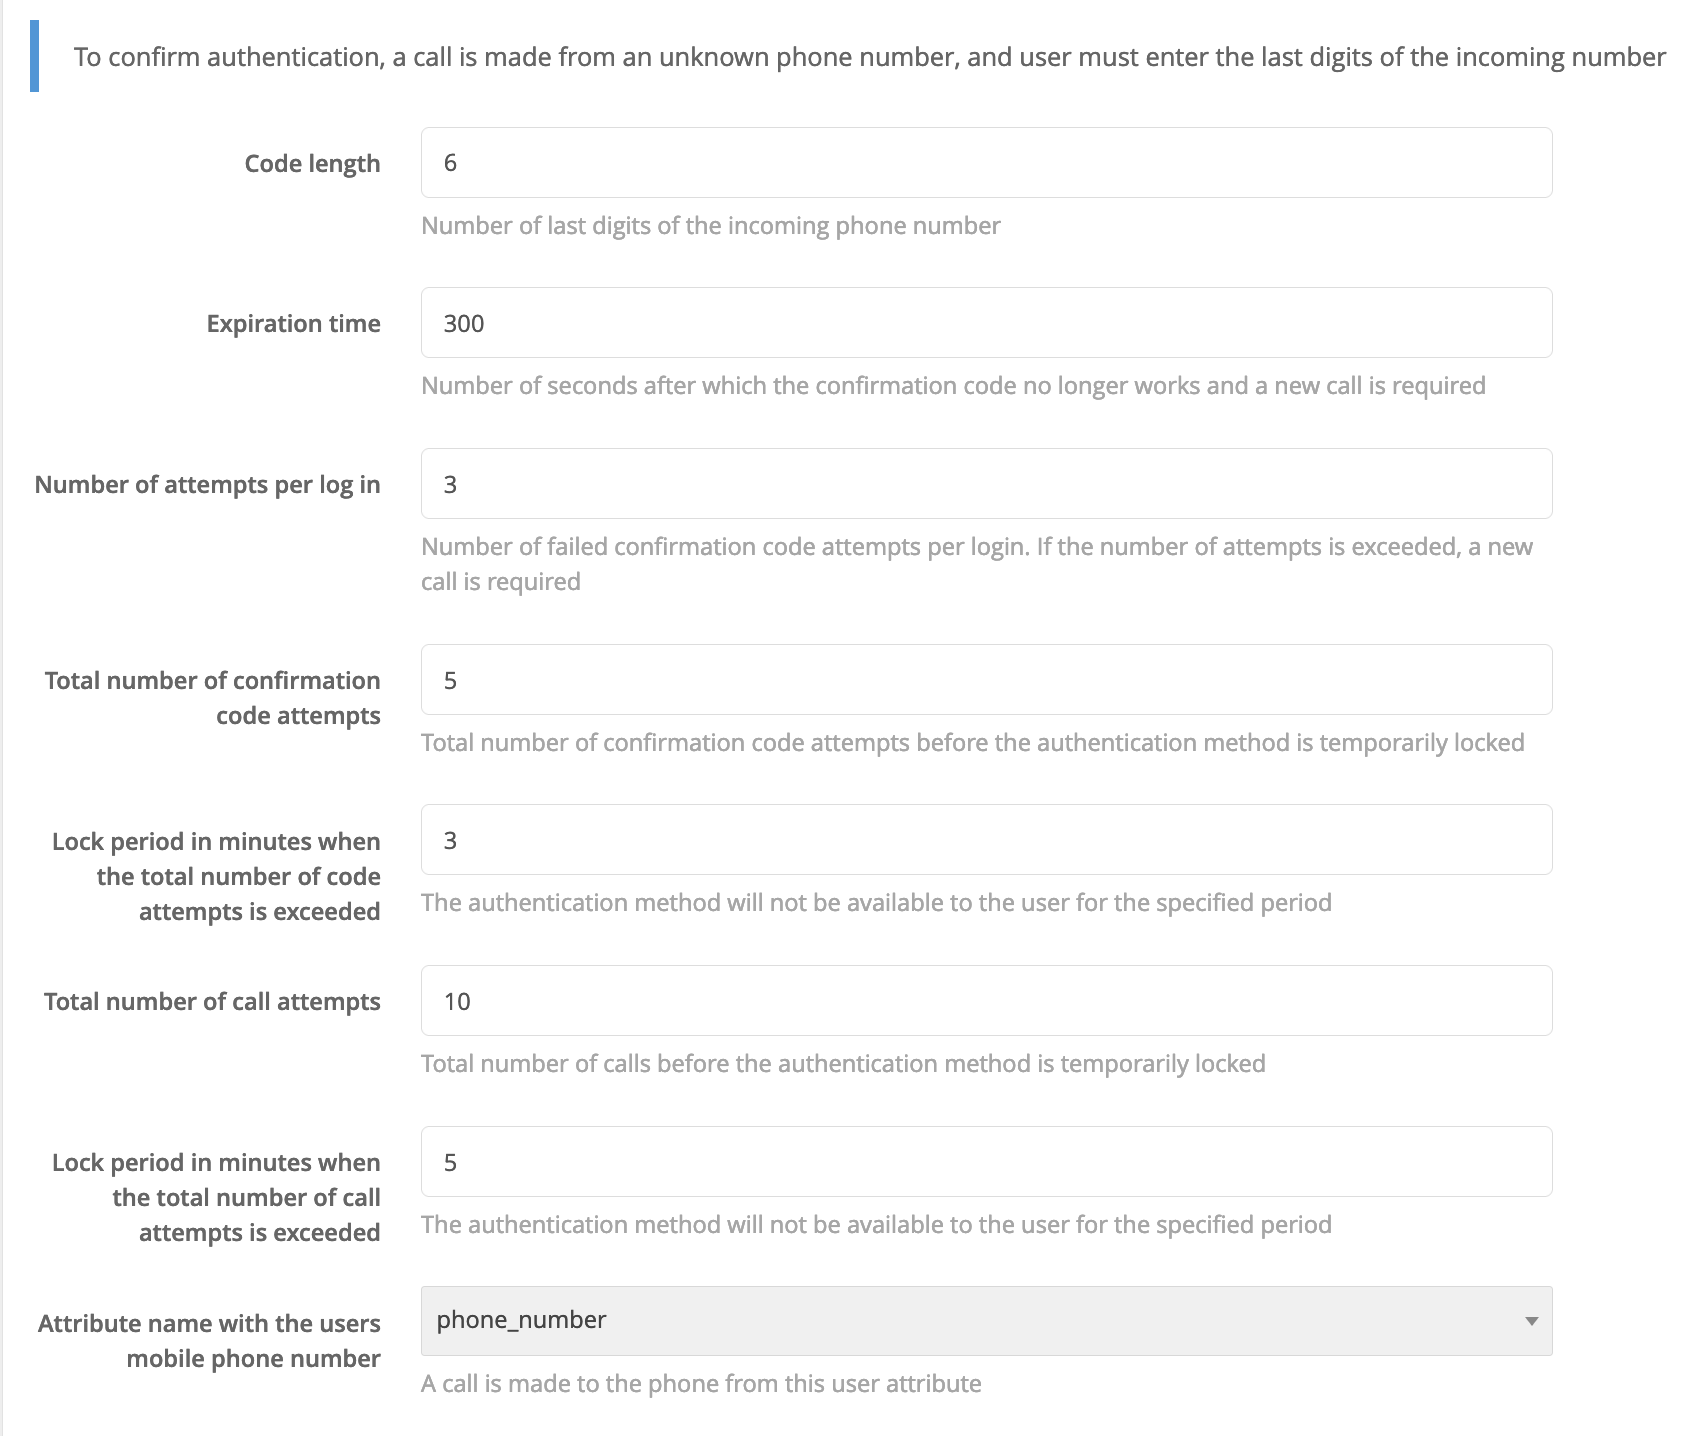
On the tab Confirmation by a Phone Call set the following settings:
Code length: The number of last digits of the incoming call number to be used as a code on the second authentication factor.Validity period: The number of seconds after which the confirmation code ceases to be valid and a second call is required.Number of attempts per login: the number of failed attempts to enter the confirmation code during one login attempt. If the number of attempts is exceeded, a second call is required.Total number of attempts: the total number of confirmation codes sent and attempts to enter a confirmation code, after which this authentication method will be temporarily blocked.Blocking time when the total number of attempts is exceeded, in minutes: during the specified time, this authentication method will be unavailable to the user.Name of the attribute with the user's mobile number: Select from the list the attribute that stores the user’s phone number for making a call.

Click Save. As a result, the configuration of the method will be updated and the tab Phone Call Provider Driver will be displayed.

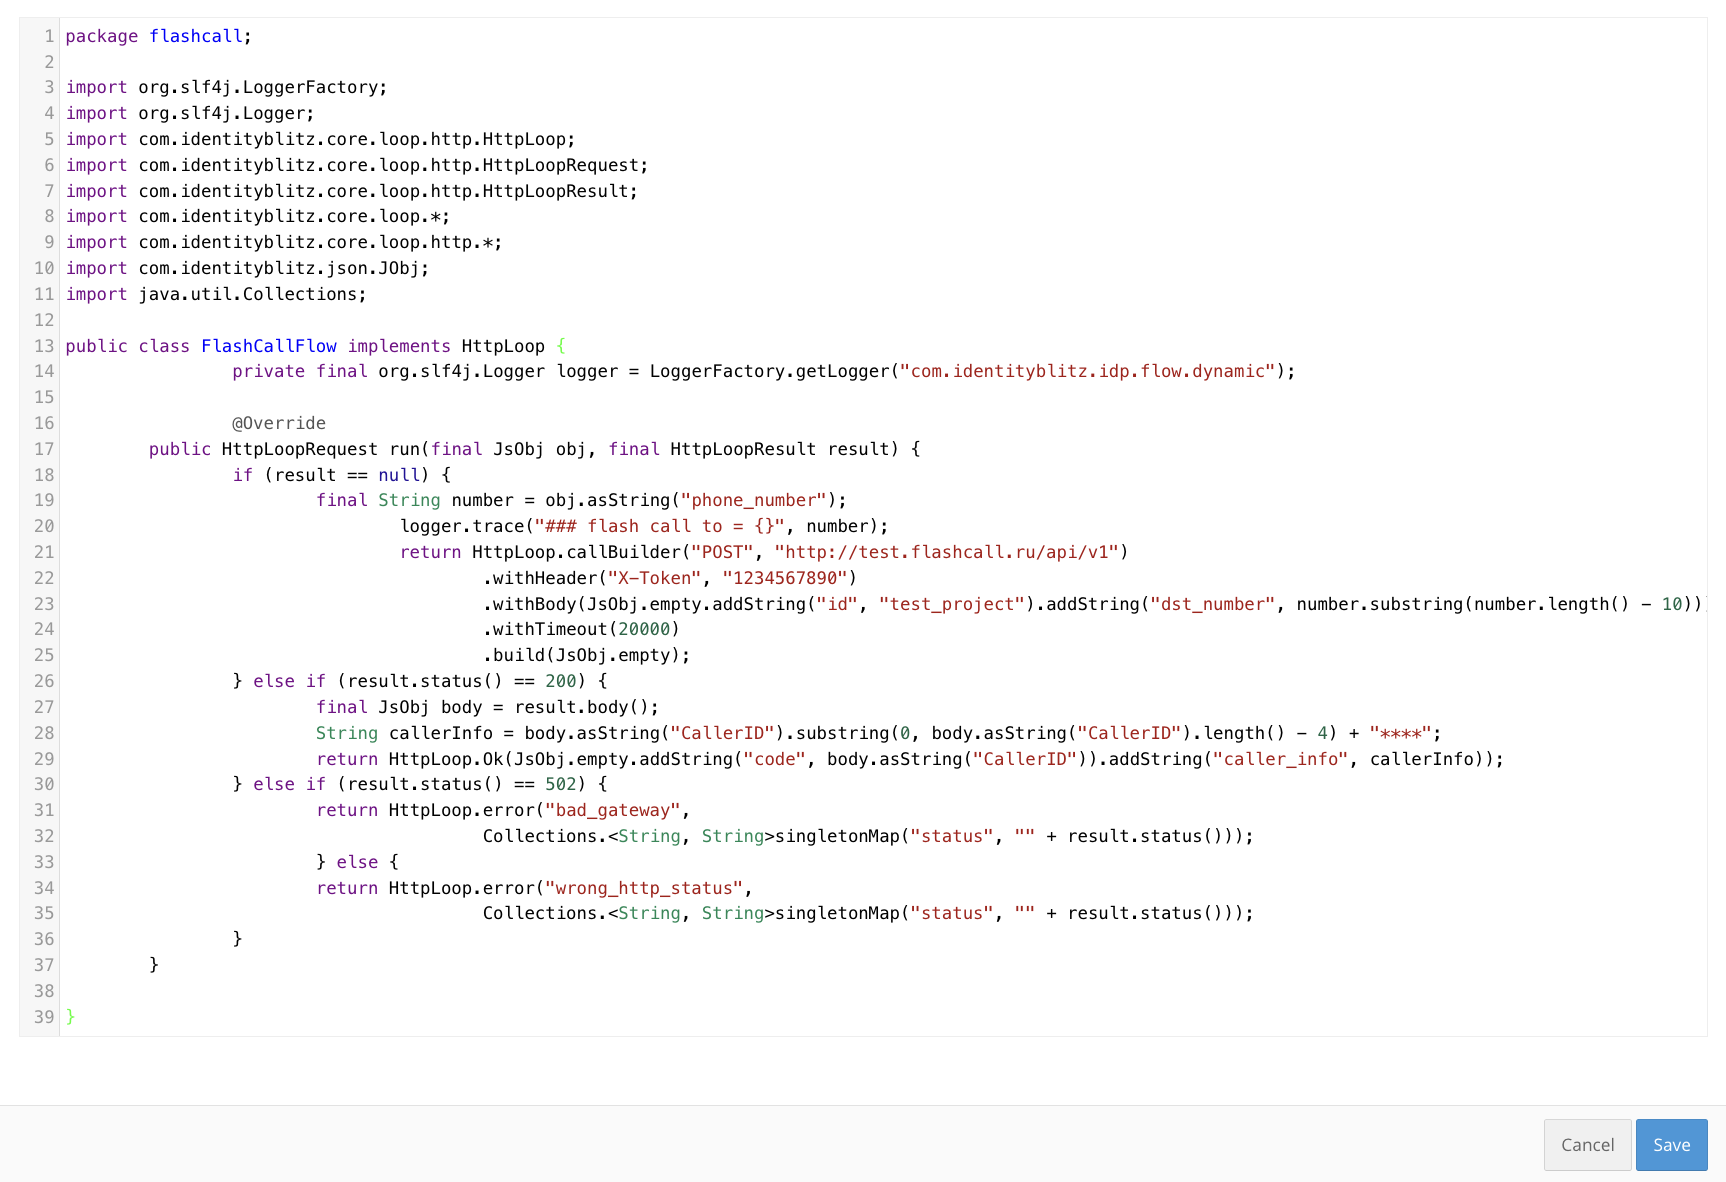
On the tab Phone Call Provider Driver set a Java procedure for integration with the REST service of the provider providing the dialer service, similar to the example below. To write the procedure, use the provider’s documentation and the settings received during registration in the provider’s service.
Example of a procedure for integration with a Flash Call provider#package flashcall; import org.slf4j.LoggerFactory; import org.slf4j.Logger; import com.identityblitz.core.loop.http.HttpLoop; import com.identityblitz.core.loop.http.HttpLoopRequest; import com.identityblitz.core.loop.http.HttpLoopResult; import com.identityblitz.core.loop.*; import com.identityblitz.core.loop.http.*; import com.identityblitz.json.JObj; import java.util.Collections; public class FlashCallFlow implements HttpLoop { private final org.slf4j.Logger logger = LoggerFactory.getLogger("com.identityblitz.idp.flow.dynamic"); @Override public HttpLoopRequest run(final JsObj obj, final HttpLoopResult result) { if (result == null) { final String number = obj.asString("phone_number"); logger.trace("### flash call to = {}", number); return HttpLoop.callBuilder("POST", "http://test.flashcall.ru/api/v1") .withHeader("X-Token", "1234567890") .withBody(JsObj.empty.addString("id", "test_project").addString("dst_number", number.substring(number.length() - 10))) .withTimeout(20000) .build(JsObj.empty); } else if (result.status() == 200) { final JsObj body = result.body(); String callerInfo = body.asString("CallerID").substring(0, body.asString("CallerID").length() - 4) + "****"; return HttpLoop.Ok(JsObj.empty.addString("code", body.asString("CallerID")).addString("caller_info", callerInfo)); } else if (result.status() == 502) { return HttpLoop.error("bad_gateway", Collections.<String, String>singletonMap("status", "" + result.status())); } else { return HttpLoop.error("wrong_http_status", Collections.<String, String>singletonMap("status", "" + result.status())); } } }
Tip
Learn more about custom errors implementation.
Enable the method Confirmation by Incoming Call in the list of methods on the tab Authentication -> Second factor.